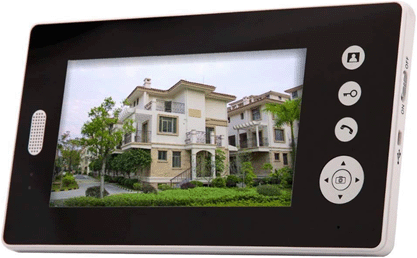
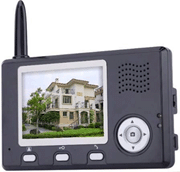
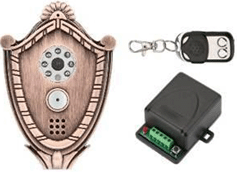
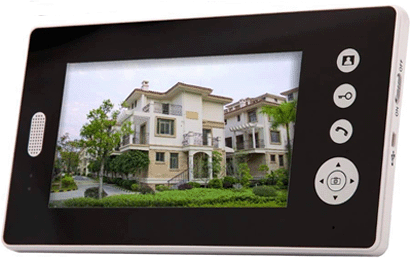
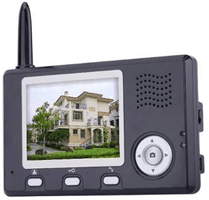
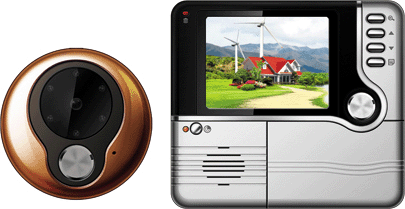
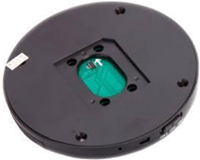
TradeSalon Doorbell and Digital Wireless Monitor
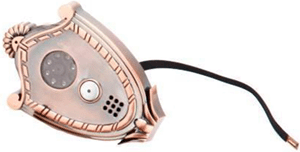
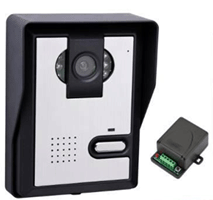
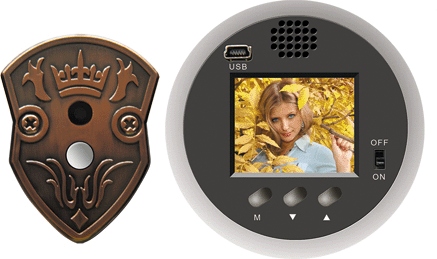
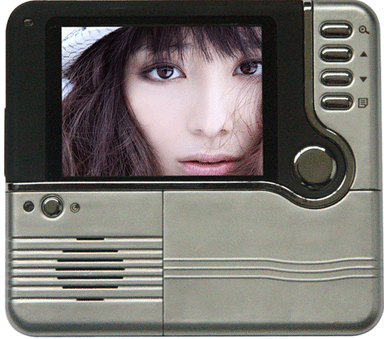
DVM01 DVM02 DVM03 DVM04 DVM05
DVM06 DVM07A DVM07B DVM08A DVM08B DVM09A DVM09B


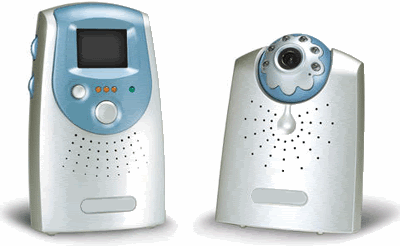
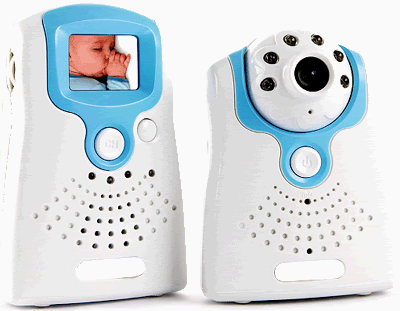
Model VDM01 Wireless Baby Monitor
Camera specification
Imaging Sensor f6.0mm, F1.8 and 1/3-inch CMOS
Frequency 2.4GHz, ISM 2,400~2,483 4CH* MHz
Channel 3 selectable channels
Size 9.2×12.3×5.9cm
Weight  175g
Voltage  DC 9V and 300mA
Power source  AC adapter or 4 AA-size batteries ( operational )
Monitor specification
Display 1.5 inches TFT LCD
CMOS Pixels 628x582(PAL)510x492(NTSC)
Brightness  260 cd/m2
Resolution 490x240
Size 8.5×14×5.3cm
Weight  240g
Voltage  DC 6V and 600mA
Power source  AC adapter or 4 AA-size batteries ( operational )
Package
Unit Packing 31 × 19 × 9.5 cm
Gross Weight 2kg
Carton 30PCs/CTN
Carton Size 63 × 58 × 48 cm
Gross Weight 62KG


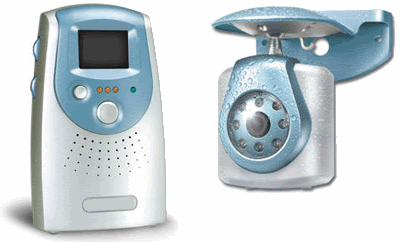
Model VDM02 Wireless Outdoor Monitor

Camera specification
Imaging Sensor f6.0mm, F1.8 1 and 3-inch CMOS
Frequency 2.4GHz, ISM 2,400~2,483 4CH* MHz
Channel 3 selectable channels
Size 9.2×12.3×5.9cm
Weight  175g
Voltage  DC 9V and 300mA
Power source  AC adapter or 4 AA-size batteries ( operational )
Monitor specification
Display 1.5 inches TFT LCD
CMOS Pixels 628×582(PAL)510×492(NTSC)
Brightness  260 cd/m2
Resolution 490x240
Size 8.5×14×5.3cm
Weight  240g
Voltage  DC 6V and 600mA
Power source  AC adapter or 4 AA-size batteries ( operational )
Package
Unit Packing 39 × 19.5 × 11.5 cm
Gross Weight 3KG
Carton 30PC/CTN
Carton Size 79 × 60 × 58 cm
Gross Weight 92KG
USD95.00/PC Free shipping
  • Pay by T/T bank to bank
  • Send by DHL or TNT
  • All goods in Stock
  • offer CE adn RoHS


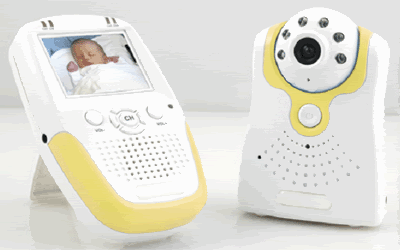
Model VDM03 2.4Ghz Analog Baby Monitor
  • Features
    This Baby Monitor allows 2. 4GHz wireless Audio Visual Transmission straight to the palm of your hand.
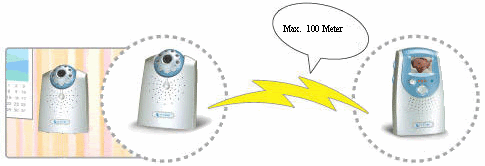
    Simply switch on the monitor to instantly see or hear your baby from a distance of up to 100m in open space.
    6 Infra Red LED lights on the camera enable Night Vision monitoring,Watch over your baby in comfort and ease.

  • Note: You must select the same channel on the camera and on the monitor.

  • Package:
    12PCs/CTN
    G. Weight: 11. 2KGS
    Carton size: 470×340×390mm
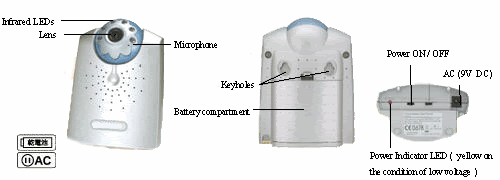
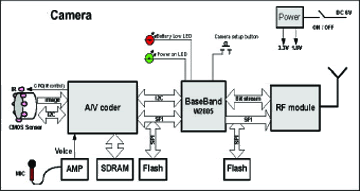
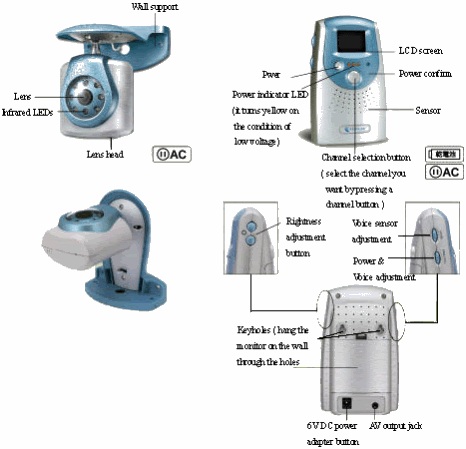
Camera
  1. Built-in antenna input Impedance 50ohm
  2. The frequency range is 2. 41~2. 47 GHz
  3. Infrared LEDs, Night Vision on
  4. Lens head, Tilt Angel Tilt:90
  5. Microphone
  6. OFF/ON (Power OFF/Power ON)
  7. Power indicator LED
  8. Keyholes for the Wall Mount and Plug
  9. Includes Wall Mount and Screws
  10. Battery compartment,can use 4 AA batteries
  11. 6V DC power adapter plug
  12. Includes 6V 300MA DC Adapter
  13. Camera dimensions: 7. 95×5. 0×11. 1cm
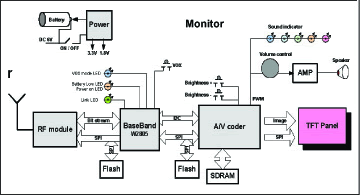
Monitor
  1. Built-in antenna input Impedance 50ohm
  2. The frequency range is 2. 41~2. 47 GHz
  3. 1. 5" TFT LCD Screen
  4. Full Color
  5. Full Audio and Visual footage
  6. Transmits up to 100m in open space
  7. Power/ Volume control
  8. power indicator LED
  9. Channel selection button (3 channel,select the channel you want by pressing a channel button. )
  10. Channel indicator LEDs
  11. Brightness adjustment button (7 levels of brightness control. The power LED will blink when pressing the (-) or (+) button to the highest or lowest level. )
  12. AV output jack (mono sound)
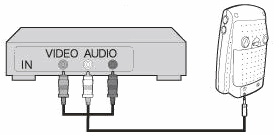
  13. Includes AV Cable for connecting to TV/Monitor
  14. Keyholes for the Wall Mount and Plug
  15. Includes Wall Mount and Screws
  16. Battery compartment,can use 4 AA batteries
  17. 7. 5V DC Power adapter plug
  18. Includes 7. 5V 500mA DC Adapter
  19. Monitor dimensions: 7. 99×4. 91×12 cm


Model VDM04 2.4Ghz Analog Baby Monitor

  • Features
    This Baby Monitor allows 2. 4GHz wireless Audio Visual Transmission straight to the palm of your hand.
    Simply switch on the monitor to instantly see or hear your baby from a distance of up to 100m in open space.
    6 Infra Red LED lights on the camera enable Night Vision monitoring and the optional Automatic Voice Activation switches the monitor ON when sound is detected. Watch over your baby in comfort and ease.

  • Note: You must select the same channel on the camera and on the monitor.

  • Package:
    12PCs/CTN
    G. Weight: 10.2KGS
    Carton size: 470×340×390mm
Camera
  1. Built-in antenna input Impedance 50ohm
  2. The frequency range is 2. 41~2. 47 GHz
  3. Infrared LEDs, Night Vision on
  4. Lens head, Tilt Angel Tilt:90
  5. Microphone
  6. OFF/ON (Power OFF/Power ON)
  7. Power indicator LED
  8. Keyholes for the Wall Mount and Plug
  9. Includes Wall Mount and Screws
  10. Battery compartment,can use 4 AA batteries
  11. 6V DC power adapter plug
  12. Includes 6V 300MA DC Adapter
  13. Camera dimensions: 7. 95×5. 0×11. 1cm
Monitor
  1. Built-in antenna input Impedance 50ohm
  2. The frequency range is 2.41~2.47 GHz
  3. 2.5" TFT LCD Screen
  4. Full Color
  5. Full Audio and Visual footage
  6. Transmits up to 100m in open space
  7. Power/ Volume control
  8. power indicator LED
  9. Channel selection button (3 channel,select the channel you want by pressing a channel button. )
  10. Channel indicator LEDs
  11. Brightness adjustment button (7 levels of brightness control. The power LED will blink when pressing the (-) or (+) button to the highest or lowest level. )
  12. AV output jack (mono sound)
  13. Includes AV Cable for connecting to TV/Monitor
  14. Keyholes for the Wall Mount and Plug
  15. Includes Wall Mount and Screws
  16. Battery compartment,can use 4 AA batteries
  17. 7. 5V DC Power adapter plug
  18. Includes 7. 5V 500mA DC Adapter
  19. Monitor dimensions: 7. 99×3.5×13 cm


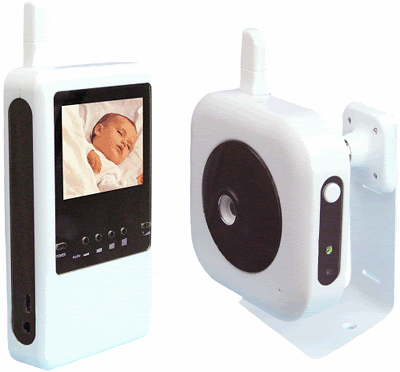
Model VDM05 2.4Ghz Digital Video Baby Monitor

  • Package:
    1pc Child Unit
    1pc Parent Unit
    2 pcs Rechargeable battery (850--900mA)
    1pc USB cable
    1pc Holder
    2pcs Adaptors
    1pc Velcro Tape for fixing the camera in bed
  • Features A
    1. General description
      * 2.4GHz transmission technology for superior clarity and range.
      * 2.4GHz Frequency Hopping technology and GFSK modulation
      * Over 250 hopping sequences to minimize interference and protect your privacy.
      * Wireless transmission range up to 40~60 meters through 3 walls and ceilings or 200~250 meters free space
      * 5V DC adaptor or 4.2V Li-ion battery
    2. Baby (Transmit) unit
      * Integrated CMOS active-pixel image sensor with VGA(640x480) resolution
      * Video processor for MPEG4 encoding
      * Audio processor for AMR encoding
      * Night-vision function by IR emitter.
      * Self-filtering microphone
    3. Parent (Receive) unit
      * High resolution 2.5 inch TFT screens(320x240).
      * Video processor for MPEG4 decoding
      * Audio processor for AMR decoding
      * Built in speaker
      * 5V DC adaptor or 4.2V Li-ion battery
      * 2. 5" Baby Monitor Operation Specification

  • Features B
    * 100% Digital Technology
    * Digital signal for crystal clear clarity
    * Digital security for complete privacy, no neighbors can be heard and seen
    * Digital zoom with selectable regions
    * Adjustable volume level, auto camera exposure and video timeout to save energy.
    * Signal strength indicator
    * WiFi Free
    * Alarm for Feeding, Alarm for morning call
    * Voice Activation
    * Dynamic audio strength indicators
    * Intelligent voice activity detector to lower noise and save battery.
    * Two transmission mode selection: Video& Audio or Audio Only
    * Sleep mode with VOX selection
    * Support RTC and Alarm
    * Support Multi-Language
    * Maxim 8 cameras, Auto, manual scan

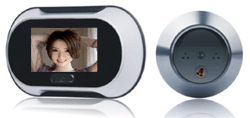
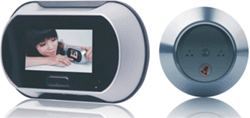
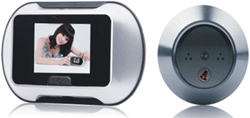
VDM06A VDM06B VDM06C
  • Barre: l2mm—90mm be suitable for Door Thickness: 35mm-80mm
  • Sensor: 0.3 Mega Pixel CMOS A rules night vision camer
  • LCD Screen: 2.8 inch TFT(Import from Taiwan) Ultra clear screen
  • View angle:160degree
  • Bell + real-time display
  • Accessories: Base Flange, Tightening Tool, Peephole, User Manual, National Warranty Card
  • Doorbell with photo-shooting Automatically take pictures of visitors
  • Barre: l2mm—90mm be suitable for Door Thickness: 35mm-80mm
  • Sensor: 0.3 Mega Pixel CMOS A rules night vision camer
  • LCD Screen: 2.8 inch TFT(Import from Taiwan) Ultra clear screen
  • view angle:160degree
  • An Auto Photo Shooting
  • Accessories: Base Flange, Tightening Tool, Peephole, User Manual, National Warranty Card
  • Doorbell with photo-shooting Automatically take pictures of visitors
  • Barre: l2mm—55mm be suitable for Door Thickness: 35mm-80mm
  • Sensor: 0.3 Mega Pixel CMOS A rules night vision camer
  • LCD Screen: 2.8inch TFT(Import from Taiwan) Ultra clear screen
  • view angle:160 degree Auto Photo Shooting , Auto Detection , Auto Message Auto Charging
  • Accessories: Base Flange, Tightening Tool, Peephole, User Manual, National Warranty Card

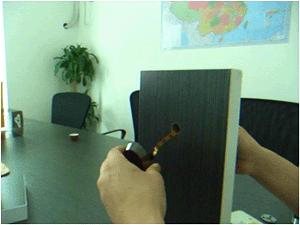
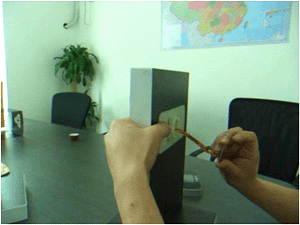
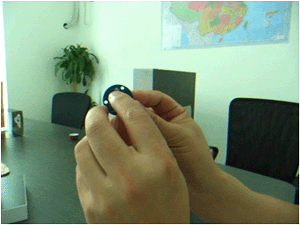
1.Insert Peephole Lens in the outside of the door.

2.Adjust the peephole Lens direction, the doorbell button is located below the perpendicular to the ground.

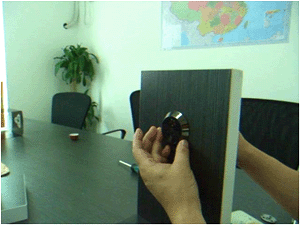
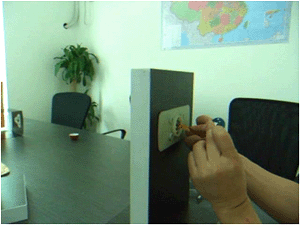
3. In the inside of the door, Insert the wire into magnetic base and the hole of circular gasket.

4. Fixed the circular gasket

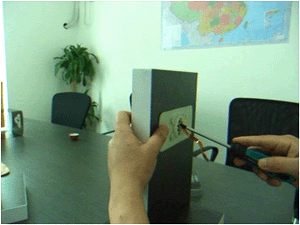
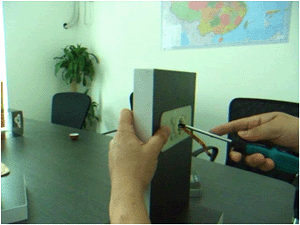
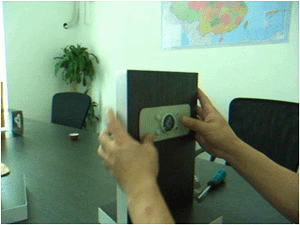
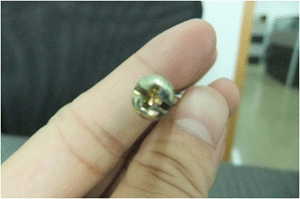
5. Use the a screwdriver to insert and tighten 2pcs Proper length of fixed screw the the circular gasket.

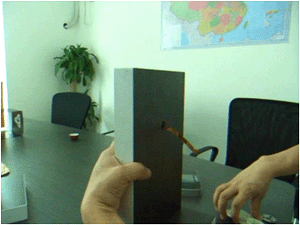
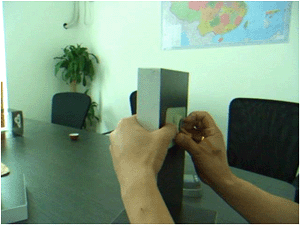
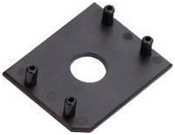
6. Connect the wire with the Small round plate. To ensure that white TOP mark on the thimble round plate is not covered by the cable. (Ensure that the two cable assemblies are joined correctly)

7. Insert the Thimble round plate into the three cylinders of the Magnetic base. The cable folded into the middle of the small round plate and magnetic base carefully. The white TOP mark on the small Round Plate must be upwards.


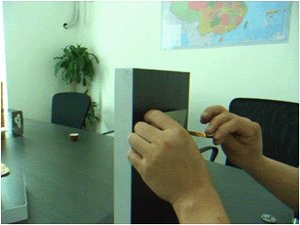
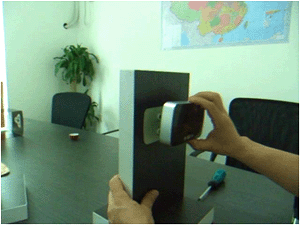
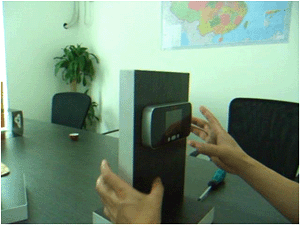
8. The same host with a magnetic close to the magnetic case , and take advantage of the magnetic and Make its joints close

9. Press the doorbell button, the bell rings, the LCD screen normal display image, on behalf of a successful installation.


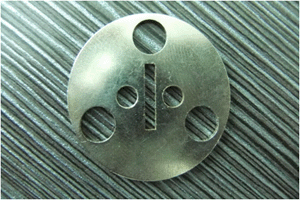
10. Circular gaskets

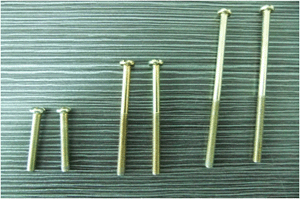
11. Set screws (mm Screw length)


2.4GHz Digital Wireless Peephole Viewer
Model VDM07B

Model VDM07A
Introduction Features Packing list Indoor monitor Installation instructions of peephole E-lock connection Operation Specifications Failure diagnosis
  1. Introduction
    The product is composed of peephole camera, peephole host, indoor monitor and wireless unlock control. You can operate the indoor monitor to communicate with visitors via voice and video, and then unlock the door if you wish. It’s applicable in apartment, hotel, office, building and so on.
    The product is easy to install in variable types of doors (the door thickness ranges from 35 to 110mm, the peephole diameter ranges from 14 to 38mm). Indoor monitor is portable. It can be hung on the wall or cabinet, or be placed on the desk, tea table.
  2. Features
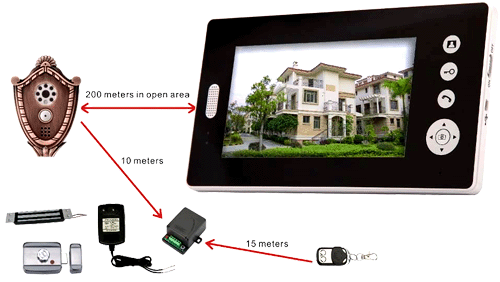
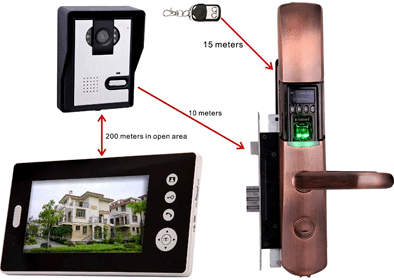
    1. 2.4GHz digital frequency hopping and encryption technology, transmission distance up to 200 meters at open area, robust anti-interference
    2. Clear night vision can capture image in low-illumination environment
    3. 3.5 or 7 inch TFT color panel for indoor monitor
    4. Surveillance, wireless unlock, hands-free call and talk
    5. 16 chord melodies and melody volume is adjustable
    6. Date (only one peephole with one indoor monitor system supports) and time shown on the screen
    7. Indoor monitor could take pictures automatically or by instruction, it could store up to 100 pictures with date and time
    8. Brightness and talk volume are adjustable
    9. BL-5J battery of peephole and monitor is replaceable and rechargeable
    10. The peephole with battery can work about 30 days. The peephole with USB power adaptor can work all the while.
    11. Wireless unlock control supports power on and power off unlock mode
    12. One peephole supports up to 4 indoor monitors and vice versa
  3. Packing list
    Peephole part:
    Camera of peephole, size: 102×70×14mm peephole host, diameter: 138mm 35mm and 24mm extended pole
    Fixed board Fixed pole A, B, C BL-5J battery
    Wireless unlock control Remote control Screws and tape
    Indoor monitor part:
    3.5” indoor monitor 7” indoor monitor USB adaptor BL-5J battery Fixed iron for 7“ indoor monitor
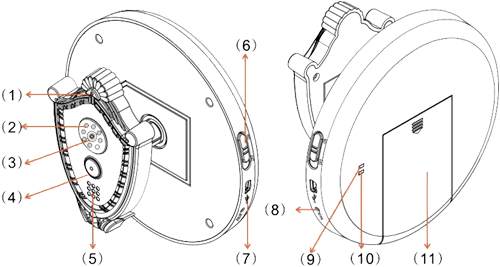
  4. Peephole
    (1) Microphone (2) Infrared light
    (3) Camera lens (4) ‘Call’button
    (5) Speaker (6) Power switch
    (7) USB interface for charge
    (8) ‘Pair’ button
    (9) Indicating light for low voltage
    (10) Indicating light for recharge
    (11) Battery lid
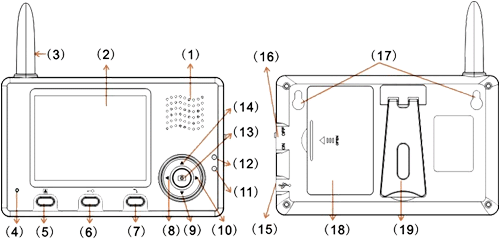
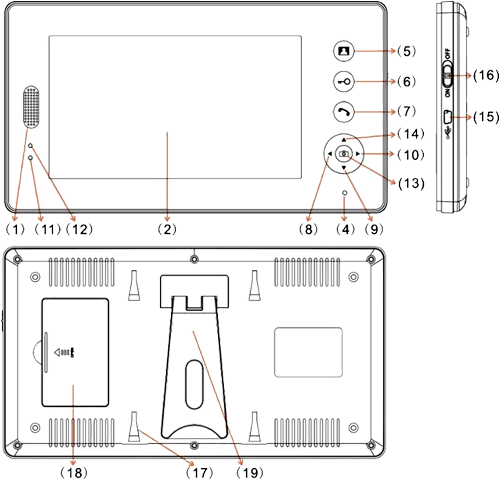
  5. Indoor monitor

    (A) 3.5” indoor monitor


    (1) Speaker
    (2) TFT screen
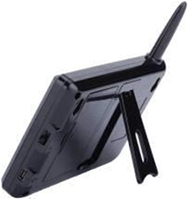
    (3) Antenna
    (4) Microphone
    (5) ‘Monitor’ button
    (6) ‘Unlock’ button
    (7) Talk’ button
    (8) Left
    (9) Down
    (10) Right
    (11) charging light
    (12) Working light
    (13) ‘Take picture ’ button
    (14) Up
    (15) USB interface
    (16) Power switch
    (17) Fixed slot
    (18) Battery lid
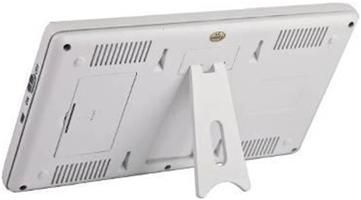
    (19) Bracket


    (B) 7” indoor Monitor


  6. Installation instructions of peephole
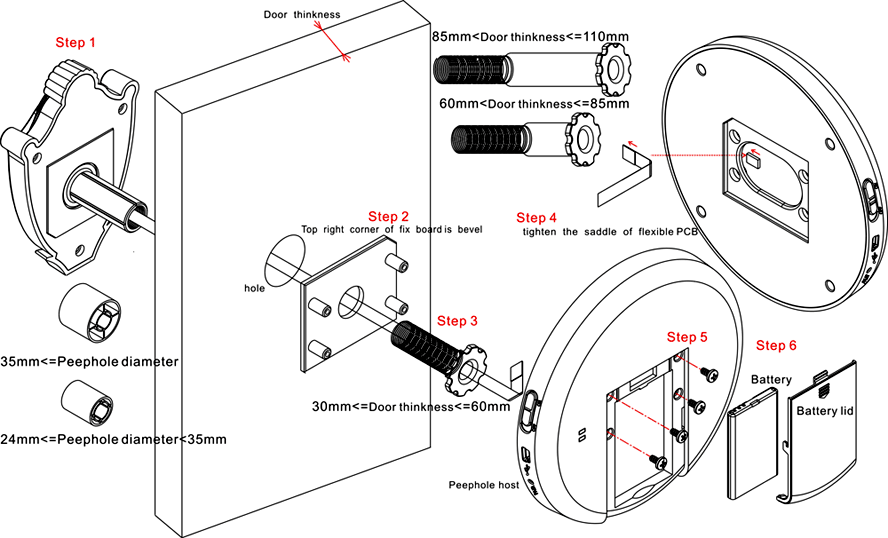
    Remark: Please make sure that the power switch is off before installation. Flexible PCB is easily twisted and flectional, you should gently lift to avoid drape, nick, crunch caused by bump with other hard thing. You can take a look at whether there is crack on the PCB. If crack, you should exchange it. Peephole is made of peephole camera and peephole host, the peephole installation process is as follows.
    Peephole is made of peephole camera and peephole host, the peephole installation process is as follows.

    • Step 1,
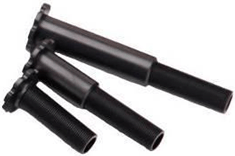
      based on the diameter of the peephole on the door, select the corresponding extended pole and fix the peephole camera. If 14mm<= peephole diameter <24mm, extended pole is not required.

      Else if 24mm<=peephole diameter<35mm, 24mm extended pole is required, Else peephole diameter>=35mm, 35mm extended pole is required. Carefully insert the peephole camera into the peephole to let flexible PCB spread out of the peephole.

    • Step 2. fix the board on the door and let flexible PCB spread out of the hole of fix board.

    • Step 3, select the fixed pole corresponding to door thickness (35mm<=door thickness<=60mm, fixed pole A is required; 60mm
    • Step 4, tighten the saddle of flexible PCB to the saddle of peephole host as the arrow direction. Please use adhesive tape to fix the flexible PCB on the main board.

    • Step 5, open the battery cover and fix the peephole host using 4 poles. Four small screws are used to fix the fixed board.

    • Step 6, Place the battery in the peephole and close the battery lid.


    Here user has to do three basic function tests for peephole.
    (1) Turn power switch to “ON”, the peephole will make a sound of “DU…DU…”.
    (2) Turn on indoor monitor, the display shows image clearly.
    (3) Press ‘call’ button of peephole, indoor monitor makes a ring. Indoor monitor can talk with peephole after pressing ‘talk’ button.

    If three tests are passed, the peephole installation is successful. After testing, If not pass, the connection between flexible PCB and peephole board may be wrong or flexible PCB may be broken down.

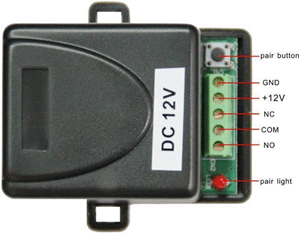
  7. E-lock connection
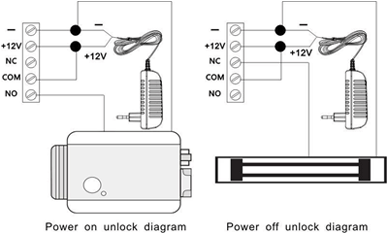
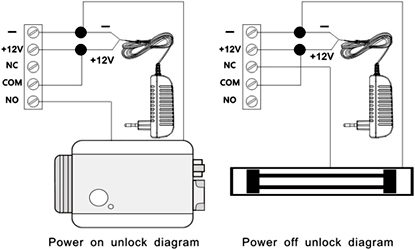
    E-lock and power of e-lock are not included in this product. Wireless unlock control connects the e-lock, shares 12V power adaptor with e-lock when it works.

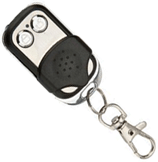
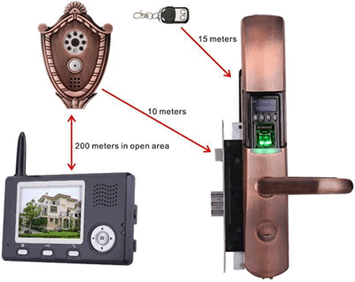
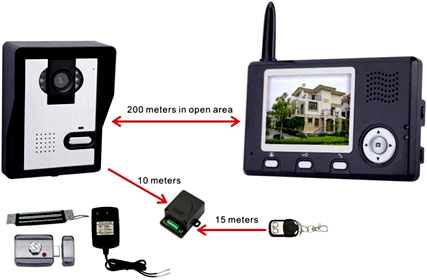
    Notes: The distance between wireless unlock control and outdoor camera should be within 10 meters so that the wireless unlock control is able to receive unlock command. The remote control uses 27A/12V battery. User presses the button of should be within 15 meters.
    Schematic diagram
    The system can work together with intelligent lock, Intelligent lock uses 4pcs AA batteries.

  8. Operation

    Note: When the system is in working condition, if there is no blocking wall between indoor monitor and peephole, you must keep them above 6 meters apart to avoid ‘whistle’ sound.

    A Setting
    1. Date and time
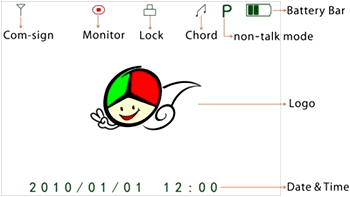
      When indoor monitor is in non-talk mode, press button for 3 seconds, there will be a "T" (for time) character on the left side of the battery symbols on the screen. Users can set the date (year/month/day) and the current time (hour/min). Time format is 24 hours. Only one peephole with one indoor monitor is available for date setting. Press, button to select, press button to adjust the date and time in grey.
    2. Melody and volume
      When indoor monitor is in non-talk mode, press button to select one of the 16 chord melodies as the sound. Press choose to the volume of melody (adjust level: 1-2). 16 chord melodies are Ding-dong, To Alice, Westminster bell, Butterfly lovers, The cygnet, Red river valley, My heart will go on, Turkey’s march, Small dance, Congratulations you, William's prelude, Love romance hudson, Memory, The Little Mermaid, Green sleeves, Romeo and Juliet.
    3. Talk volume
      In the talk mode, press , to adjust the talk volume, adjust level: 0-7
    4. Brightness
      In the talk mode, when indoor monitor has dynamic image from peephole, press , to adjust brightness. Adjust level: 0-7


    B Operation
    1. Peephole on: Turn the power switch to ‘ON ’, it will work about 30 days.
      Peephole off: Turn the power switch to “OFF” to close the peephole.
      Indoor monitor on: Turn the power switch to “ON”, working light displays red and rings the melody.
      Indoor monitor off: Turn the power switch to “OFF”, working light is off. Maximum com-sign is level 6. Maximum battery bar is level 4.

    2. Talk, unlock
      Visitor presses “call” button of the peephole. All indoor monitors will sound melody.
      1. Press button of one indoor monitor to speak to visitor before unlock. If you want to let other indoor monitor to talk, press button to end the current dialogue, then another indoor monitor could press button to speak to visitor.
        When in talk mode, press button to unlock the door lock, the unlock signal shows on the screen. When press button to unlock the door lock, the unlock signal button, the unlock signal will disappear. Press button to turn off the screen and enter standby mode, or it will turn into standby mode automatically after 30 seconds.

      2. If you do not want to let the visitor go in, no operation or press the turn off the screen and then enter into standby mode. button to Indoor monitor enters into the standby mode after 30 seconds if no any operation.
        Note: if you use multiple indoor monitors, please keep distance among indoor monitors.
    3. Monitor For one peephole or more peepholes with one indoor monitor, if there is no calling from the peephole, and the indoor monitors are in standby mode. User can press the button once to wake up the indoor monitor. Press button again to enter monitor mode and monitor the outdoor as long as you like, monitor signal will display on the screen. Press button again to quit and turn off the screen.
      For several peepholes with one indoor monitor, in monitor mode, press button to show the image from the CAM1, CAM2, CAM , CAM4 (if the system has) in sequence. At the last peephole, press button again to quit and turn off the screen.
    4. Charge
      For the first time, the battery should be charged for 3 hours every time, Charging led is in red when charging, it turns green when the battery is filled. The color of the battery bar will change from green to red when the battery is in low power.


    C. Picture
    1. Take pictures
      When there is video from peephole, press button to take a picture, one press captures one picture.
      When the call button of peephole is pressed, if the user isn't in or no any operation, all indoor monitors automatically save the image from the outdoor after 10 seconds. When take a new picture, it will replace the first picture if no is available.

    2. Browse pictures
      In the non-talk mode, press , button to browse the stored pictures, then press button or after 10 seconds to quit browse mode.

    3. Delete pictures
      Firstly turn off the indoor monitor, then press and button together, turn on the indoor monitor, press and button until the screen displays text: ’Delete all photo, please wait’‘no photo , Please Power off’. After that all pictures have been deleted. Please turn off the indoor monitor.


    D Pair
    1. Pair peephole with indoor monitor
      Remarks: The system only supports 3 models. User can’t mix them when purchase. For one-to-one system, adding more peepholes host can’t become multiple-to-one system. Adding more indoor monitor can’t directly become one-to-multiple system.
      1. One peephole and one indoor monitor system
        Press ‘pair’ button of peephole, indicating light flash, press and button of indoor monitor at the same time, the screen will show “ver. 1v1 paring’. If pairing succeeds, the video from peephole will be shown in the screen of indoor monitor.
      2. One peephole and up to 4 indoor monitors system
        Firstly, press ‘pair’ button of peephole, indicating light flash, press and button of indoor monitor at the same time, the screen will show “VER. 1v4 pairing. If pairing succeeds, the video from peephole will be shown in the screen of indoor monitor. Secondly, repeat the above operation for each indoor monitor.
      3. Up to 4 peepholes and one indoor monitor system
        Remarks: To pair this system is more complex than to do the above two systems. After turn on peephole and indoor monitor, press button as soon as possible so not let any part enter into standby mode.
        Firstly, press the pair button of peephole, indicating light flash, press and button of indoor monitor at the same time, the screen will show “ver4 4V1 pairing. If pairing succeeds, the video from peephole will be shown in the screen of indoor monitor.
        Secondly, repeat the above operation as soon as possible until finish all pairing. Thirdly, check whether pairing succeed, let system power on again, and then press ‘monitor ’button continuously to monitor each peephole, if each one can work, it means that system pairs successfully.
        Otherwise repeat the first step.
    2. Pair unlock control with door phone system
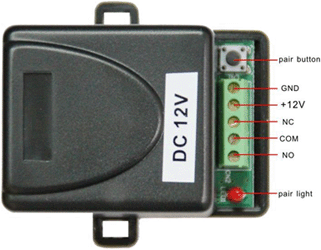
      Unlock control is connected to 12V power adaptor. Peephole uses the battery, or is connected to the power adaptor. Firstly press the pair button of unlock control, the pair light will flash once. Press the light will continuously flash. button of the indoor monitor under talk mode, pair Once again press the pair button of unlock control, pair light stops flashing. Finally press the button of the indoor monitor under talk mode, the pair light will flash 3 seconds, it means that pairing is successful.
    3. Pair remote control with unlock control
      Unlock control is connected to 12V power adaptor. Firstly press the pair button of unlock control, pair light will flash once. Press the button of remote control, pair light will continuously flash. Once again press the pair button of unlock control, pair light will stop flashing. Finally press the button of remote control, the pair light will flash 3 seconds, it means that pairing is successful.


  9. Specifications
    Peephole Indoor monitor
    Light Source 6 LED lights USB Power Input:100-240V 50/60Hz
    Output:DC 5V/1A
    Camera CMOS 300K Screen "3.5" TFT 320×240
    7 TFT 800×480
    Battery BL-5J 1250mAh Battery BL-5J 1250mAh
    Size 102×70×13.8mm Size "3.5"141×87×20 mm
    "7" 236×130×18 mm
    Standby 35 days Standby "3.5"20 days
    "7" 30 days


  10. Failure diagnosis
    Defect Judgment Operation
    Indoor monitor or peephole unable to start If turn the switch to the “on” Turn the switch to the On
    If the power of li-ion batteries is not enough Charge the li-ion batteries
    Indoor monitor or peephole unable to charge If the plug of power adaptor correctly plug into USB charging Re-connect the devices and power adaptor
    If battery is in indoor monitor or peephole Open battery cover, insert battery, and then insert the battery cover.
    Speaking state no voice If the volume is adjusted to be the least To adjust the volume to be suitable
    The image is flicking or noise If the indoor monitor is close to TV set, fluorescent lamps, mobile monitor which has microwave oven and magnetic wave Keep off these things which have microwave oven and magnetic wave.
    The indoor monitor shows no signal image If the indoor monitor is far away from the indoor monitor Keep the distance within 60 meters
    If there is other strong magnetic space bother Put the indoor device out of the strong magnetic space

2.4GHz Digital Wireless Video Door Phone
Model VDM08B

Model VDM08A
Introduction Features Packing list Outdoor camera
Indoor monitor
Installation
instructions
E-lock connection Operation Working
environment
Notices Specifications Failure diagnosis
  1. Introduction
    The product is applicable in office, house, apartment, hotel, building and so on. The outdoor camera is easy to install. Indoor monitor is portable. It can be hung on the wall, or be placed on the desk.

  2. Features
    1. 2.4GHz digital frequency hopping and encryption technology, transmission distance up to 200 meters in free field, robust anti-interference
    2. Clear night vision can capture image in low-illumination environment
    3. Rain shield for the outdoor camera is available
    4. 3.5 or 7 inch TFT color panel for indoor monitor
    5. Surveillance, unlock, hands-free call and talk
    6. 16 chord melodies and melody volume is adjustable
    7. Brightness and talk volume are adjustable
    8. Date (only one camera with one indoor monitor system supports) and time shown on the screen
    9. Indoor monitor could take pictures automatically or by instruction. It could store up to 100 pictures with date and time
    10. BL-5J battery of camera and monitor is replaceable and rechargeable
    11. Outdoor camera with battery works about 30 days if with battery, the outdoor camera with power adaptor works all the while.
    12. Wireless unlock control supports power on and power off unlock
    13. One outdoor camera supports up to 4 indoor monitors and vice versa


  3. Packing list
    Outdoor camera part

    (1)

    (2)

    (3)
    1. 3.5” indoor monitor
    2. Outdoor camera
    3. 7 indoor monitor
    4. Fixed iron for 7” indoor monitor
    5. USB power adaptor; Input: 100-240V 50/60Hz Output: 5V/1A
    6. Wireless unlock control
    7. Remote control (optional)
    8. Screws and stoppers
    9. Power adaptor Input: 100-240V 50/60Hz Output: 5V/1A
    10. double-sided tape
    11. DC cable
    12. BL-5J battery (optional)

    (4)

    (5)

    (6)

    (7)

    (8)

    (9)

    (10)

    (11)

    (12)


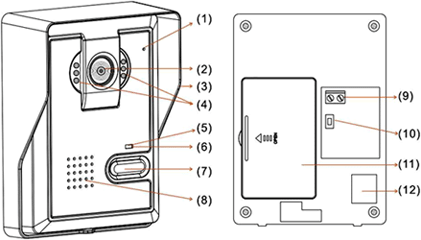
  4. Outdoor camera
    (1) Microphone
    (2) Camera lens
    (3) Rain shield
    (4) Infrared light
    (5) Indicating light, show green if press ‘pair’ or ‘call’ button, show redif low voltage
    (6) Indicating light for recharge
    (7) ‘Call’button
    (8) Speaker
    (9) Adaptor interface (+5V, GND)
    (10) ‘Pair’ button
    (11) Battery lid
    (12) Obligate area welding antenna


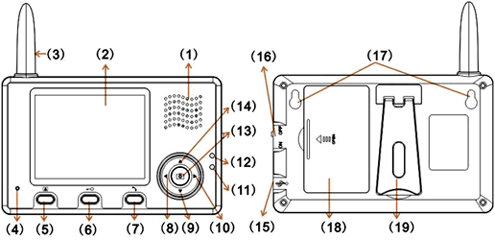
  5. Indoor monitor

    ⇒3.5” indoor monitor


    (1) Speaker
    (2) TFT screen
    (3) Antenna
    (4) Microphone
    (5)‘Monitor’ button
    (6)’Unlock’ button
    (7) ’Talk’ button
    (8)Left
    (9) ▼Down
    (10) Right
    (11) charging light
    (12) Working light
    (13)‘Take picture ’ button
    (14) ▲Up
    (15) USB interface
    (16) Power switch
    (17) Fixed slot
    (18) Battery lid
    (19) Bracket


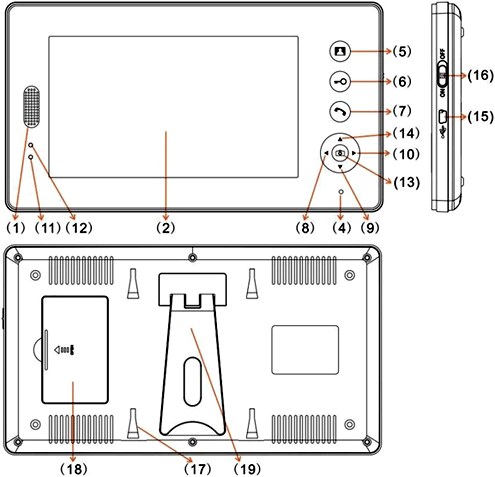
    ⇒7” indoor monitor


  6. Installation instructions
    The outdoor camera should be installed at the shielded position to be free from direct shinning of strong light and raining. The height for installation is recommended to be 1.5m~1.7m for outdoor camera to focus on the best monitoring range.
    Wireless signal will be weakened if there are obstacles between the outdoor camera and the indoor monitor. Please check the best sign of monitor when install the outdoor camera to get the best position.
    If wiring needs to go through wall, the plug should be firstly wrapped with tape so as to avoid the sand or dirt going into the plug thus resulting in malfunction.
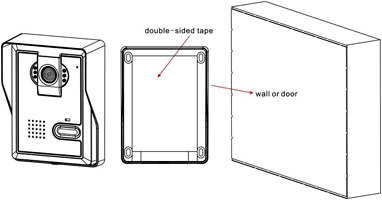
    Use double-sided tape fix outdoor camera on the wall or door as the following diagram.

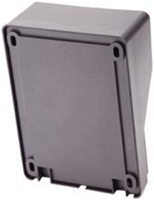
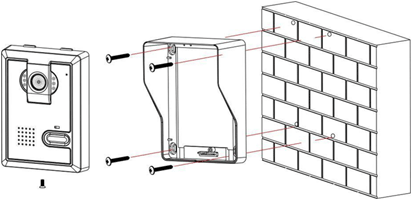
    Or take off the screw on the bottom, remove the back box fit to the wall, embed the outdoor camera to the back box and use the screw to fix it as the following diagram.


  7. E-lock installation
    E-lock and power of e-lock are not included in this product. Wireless unlock control connects the e-lock, shares 12V power adaptor with e-lock when it works. Notes: The distance between wireless unlock control and outdoor camera should be within 10 meters so that the wireless unlock control is able to receive unlock command. The remote control uses 27A/12V battery. User presses of remote control to unlock. The work distance between remote control and unlock control should be within 15 meters.


    Schematic diagram
    The system can work together with intelligent lock, Intelligent lock uses 4pcs AA batteries.


  8. Operation

    Note: When the system is in working condition, if there is no blocking wall between indoor monitor and peephole, you must keep them above 6 meters apart to avoid ‘whistle’ sound.

    A Setting
    1. Date and time
      When indoor monitor is in non-talk mode, press button for 3 seconds, there will be a "T" (for time) character on the left side of the battery symbols on the screen. Users can set the date (year/month/day) and the current time (hour/min). Time format is 24 hours. Only one peephole with one indoor monitor is available for date setting. Press, button to select, press button to adjust the date and time in grey.
    2. Melody and volume
      When indoor monitor is in non-talk mode, press button to select one of the 16 chord melodies as the sound. Press choose to the volume of melody (adjust level: 1-2). 16 chord melodies are Ding-dong, To Alice, Westminster bell, Butterfly lovers, The cygnet, Red river valley, My heart will go on, Turkey’s march, Small dance, Congratulations you, William's prelude, Love romance hudson, Memory, The Little Mermaid, Green sleeves, Romeo and Juliet.
    3. Talk volume
      In the talk mode, press , to adjust the talk volume, adjust level: 0-7
    4. Brightness
      In the talk mode, when indoor monitor has dynamic image from peephole, press , to adjust brightness. Adjust level: 0-7


    B Operation
    1. Peephole on: Turn the power switch to ‘ON ’, it will work about 30 days.
      Peephole off: Turn the power switch to “OFF” to close the peephole.
      Indoor monitor on: Turn the power switch to “ON”, working light displays red and rings the melody.
      Indoor monitor off: Turn the power switch to “OFF”, working light is off. Maximum com-sign is level 6. Maximum battery bar is level 4.

    2. Talk, unlock
      Visitor presses “call” button of the peephole. All indoor monitors will sound melody.
      1. Press button of one indoor monitor to speak to visitor before unlock. If you want to let other indoor monitor to talk, press button to end the current dialogue, then another indoor monitor could press button to speak to visitor.
        When in talk mode, press button to unlock the door lock, the unlock signal shows on the screen. When press button to unlock the door lock, the unlock signal button, the unlock signal will disappear. Press button to turn off the screen and enter standby mode, or it will turn into standby mode automatically after 30 seconds.

      2. If you do not want to let the visitor go in, no operation or press the turn off the screen and then enter into standby mode. button to Indoor monitor enters into the standby mode after 30 seconds if no any operation.
        Note: if you use multiple indoor monitors, please keep distance among indoor monitors.
    3. Monitor For one peephole or more peepholes with one indoor monitor, if there is no calling from the peephole, and the indoor monitors are in standby mode. User can press the button once to wake up the indoor monitor. Press button again to enter monitor mode and monitor the outdoor as long as you like, monitor signal will display on the screen. Press button again to quit and turn off the screen.
      For several peepholes with one indoor monitor, in monitor mode, press button to show the image from the CAM1, CAM2, CAM , CAM4 (if the system has) in sequence. At the last peephole, press button again to quit and turn off the screen.
    4. Charge
      For the first time, the battery should be charged for 3 hours every time, Charging led is in red when charging, it turns green when the battery is filled. The color of the battery bar will change from green to red when the battery is in low power.


    C. Picture
    1. Take pictures
      When there is video from peephole, press button to take a picture, one press captures one picture.
      When the call button of peephole is pressed, if the user isn't in or no any operation, all indoor monitors automatically save the image from the outdoor after 10 seconds. When take a new picture, it will replace the first picture if no is available.

    2. Browse pictures
      In the non-talk mode, press , button to browse the stored pictures, then press button or after 10 seconds to quit browse mode.

    3. Delete pictures
      Firstly turn off the indoor monitor, then press and button together, turn on the indoor monitor, press and button until the screen displays text: ’Delete all photo, please wait no photo , Please Power off’. After that all pictures have been deleted. Please turn off the indoor monitor.


    D Pair
    1. Pair outdoor camera with indoor monitor
      Note: The system only support 3 models as below. User can’t mix them when purchase. For one-to-one system, adding more outdoor camera or more indoor monitor can’t become one-to-multiple system.
      1. One outdoor camera and one indoor monitor system
        Press ‘pair’ button of outdoor camera, indicating light flash, press and button of indoor monitor at the same time, the screen will show “ver4 1v1 pairing”. If pairing succeeds, the video from outdoor camera will be shown in the screen of indoor monitor.
      2. One outdoor camera and up to 4 indoor monitors system
        Firstly, press ‘pair ’ button of outdoor camera, indicating light flash, press and button of indoor monitor at the same time, the screen will show “ver4 1v4 pairing”.If pairing succeeds, the video from outdoor camera will be shown in the screen of indoor monitor. Secondly, repeat the above operation for each indoor monitor.
      3. Up to 4 outdoor cameras and one indoor monitor system
        Note: To pair this system is more complex than to do the above two systems. After turn on outdoor camera and indoor monitor, press button ASAP so not let any part enter into standby mode.
        Firstly, press the ‘pair’ button of outdoor camera, indicating light flash, press and button of indoor monitor at the same time, the screen will show “ver4 4v1
        Secondly, repeat the above operation as soon as possible until finish all pairing.
        Thirdly, check whether pairing is successful, let system power on again, and then press ‘monitor’button continuously to monitor each outdoor camera. If each outdoor camera works, it means that system pairs successfully.
        Otherwise repeat the first step.
    2. Pair unlock control with door phone system
      Unlock control is connected to 12V power adaptor. Outdoor camera uses the battery, or is connected to the power adaptor. Firstly press the pair button of unlock control, the pair light will flash once. Press the button of the indoor monitor under talk mode, pair light will continuously flash. Once again press the pair button of unlock control, pair light stops flashing. Finally press the button of the indoor monitor under talk mode, the pair light will flash 3 seconds, it means that pairing is successful.
    3. Pair remote control with unlock control
      Unlock control is connected to 12V power adaptor. Firstly press the pair button of unlock control, pair light will flash once. Press the button of remote control, pair light will continuously flash. Once again press the pair button of unlock control, pair light will stop flashing. Finally press the button of remote control, the pair light will flash 3 seconds, it means that pairing is successful.
  9. Working environment
    (1) Working temperature: -15℃—+55℃ (2) Working humidity: ≤85%
  10. Notices (1) Please don’t cover anything on the Microphone or speaker when it is in working mode. (2) Please always use the specified power adaptor, or that with the same model (same standard voltage and current). (3) Do not attempt to service this product yourself as opening or removing covers may expose you to dangerous voltage or other hazards.
  11. Specification
    Camera Indoor monitor
    Light Source 6 LED lights USB Power Input:AC 100-240V
    50/60Hz
    Output:DC 5V/1A
    Camera "CMOS 300K pixels" Screen "3.5”TFT 320×240
    7”TFT 800×480
    Battery BL-5J 1250mAh Battery BL-5J 1250mAh
    Frequency 2.4GHz Frequency 2.4GHz
    Size 126×93×42 mm Size "3.5”141×87×20 mm
    7” 236×130×18 mm
    Installation Double-sided tape or screw fix Installation Place on the desk etc. Or Wall mounting type
    Charge time 3hours Charge time 3hours
    Standby 35 days Standby "3.5” 20 days
    7” 4 days
  12. Failure Diagnosis
    Malfunction Checking Debug
    Fail to start the product If turn the switch to the “on” Turn the switch to the On
    If the power of li-ion batteries is not enough Charge the li-ion battery
    Fail to charge If the plug of power adaptor correctly plug into miniUSB Re-connect indoor monitor with power adaptor
    If the power adaptor correctly get through the 100-240V AC electricity Re-insert the plug to make power adaptor get AC electricity.
    No voice in talk mode If the talk volume is adjusted to be the least To adjust the volume to be suitable
    The image is flicking or noise If the indoor monitor is close to induction cooker and microwave oven which has magnetic wave Keep indoor monitor far away from these things which has magnetic wave.
    No signal in indoor monitor If the outdoor camera doesn't connect the power To connect power adaptor to the outdoor camera
    If the outdoor camera is far away from the indoor monitor Keep the distance within 60 meters within (stopped by multi-wall)
    If there is other strong magnetic space bother Keep indoor monitor far away from the strong magnetic space

General Information
  1. Warning and Notice
  2. Installing and Using
  3. Using T-Flash Card
Brief Introduction
  1. Sketch Map
  2. Main Feature
  3. Technical Specification
  4. Main Function


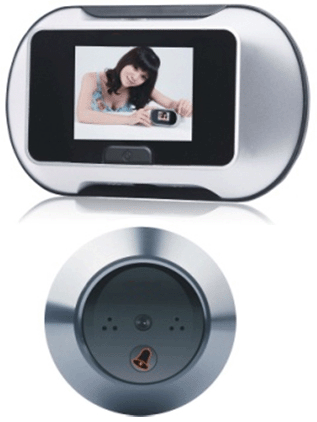
Visual Doorbell
Use specification
  1. Function Use
  2. Settings
  3. Display Settings
    1. Clock Settings
    2. LCD Backlight
    3. HW Version
  4. Record Settings
    1. Record Mode
    2. Shoot Mode
    3. Video Time
  5. Ring Settings
    1. Playing Mode
    2. Playing Time
    3. Playing Volume
  6. File Manage
    1. Photo View
    2. Video View
    3. U-disk Mode
    4. Format Card
  7. Monitor
  8. Charge

Model VDM09A


Model VDM09B
General Information
We are pleased that you have chosen this visual music doorbell. For efficient use of the visual music doorbell, you need to read this manual before your using.
The Doorbell also provides some practical function to meet your various requirements, apart from seeing, photograph and MP3 Music.
Manufacturers reserve the right to revise this manual without giving advance notice. For your safe and proper use of the doorbell, this doorbell must be installed into the door by skilled worker.
  1. Warning and Notice
    1. General Notices
      Do not place your doorbell on uneven or unstable table, to prevent falling and damage. cause battery leakage, overheating, burst or fire. Do not strike, shake or sling your Doorbell. It can prevent damage or fire. Do not place your doorbell, battery or charger in microwave oven or high-voltage equipment; otherwise it may cause accidents, such as circuit damage or fire. Do not use your doorbell in the place where there is inflammable and explosive gas; otherwise it may cause your phone failure or fire. Do not put your doorbell in the place of high temperature, high humidity or the place where there is a lot of dust; otherwise it may cause your phone failure.
    2. Notices of the doorbell
      Do not press the LCD strongly or strike other things with your doorbell; otherwise it can cause damage to LCD or leakage of LCD liquid. If LCD liquid accidentally gets into your eye, you may become blind. At this very moment, do not knead your eye. You should immediately wash your eye with water and then go to hospital. Do not dismantle or refit your doorbell; otherwise it will cause damage to your phone, leakage of electricity and circuit failure. Do not press the keys with sharp things, such as needle or nib; otherwise it may cause damage to your phone or misoperation. Do put the small metal objects such as thumbtack far away from the loudspeaker because the loudspeaker is magnetic while it is working and it can attract these small metal objects. It may cause injury to the person or damage to the loudspeaker.
    3. Notices of Charger Use
      Visual Doorbell User Guide You can use Charger or connect the doorbell with computer by data cable for charge. Do use alternating current of 110V/220V. Using other voltage can cause leakage of electricity, fire or damage to your phone and the charger. Do not short-circuit the charger; otherwise it can cause electric shock, smoking or damage to the charger.Do not use the charger while the power line is damaged; otherwise it can cause fire or electric shock. Do wipe the socket and remove the dust in time Do not place the container filled with water near the charger; otherwise it can cause overheating, leakage of electricity and failure if water spills out. If the charger accidentally contacts water or other liquid, you should immediately unplug the charger so as to avoid overheating, fire, electric shock or failure of the charger. Do not dismantle or refit the charger; otherwise it can cause electric shock, fire, damage to the charger or injury to the person. Do not use the charger in the place of high humidity, such as bathroom; otherwise it can cause electric shock, fire or damage to the charger. Do not touch the charger, power line and socket with wet hand; otherwise you can get an electric shock. Do not put heavy things on the power line or refit the wire; otherwise it can cause electric shock or fire. Do unplug the charger before you clean and maintain it. Do Hold the charger if you unplug it. Do not pull the power line. It may damage the wire and cause electric shock or fire.
    4. Care and Maintenance
      Keep your doorbell dry. If water or other liquid gets into the doorbell, it may erode the circuit, then damage the doorbell. Do not put the doorbell near the place with the high temperature. Otherwise it can cause leakage of electrolyte, shorten the using life of electronic equipment, soften and melt plastic parts. Do not put the doorbell in the place with lower temperature. When move the doorbell from lower temperature environment to normal temperature environment, the doorbell may cover the moisture, the moisture may damage the circuit board. Do not dismantle or refit the doorbell; Wrong operation may cause damage the doorbell. Do not strike, shake or sling your doorbell, it can damage the Printed Circuit Board of doorbell. If wet the doorbell because of negligence, please turn off the doorbell immediately, take the doorbell from the door. If you want to use the doorbell again, please past 24 hours and confirm the doorbell must be dry. Do not put other metal objects into the charge mouth of the doorbell, it may cause short circuit.
      Warning: Guarantee must be invalid if wrong operation cause doorbell damage.

  2. Installing and Using
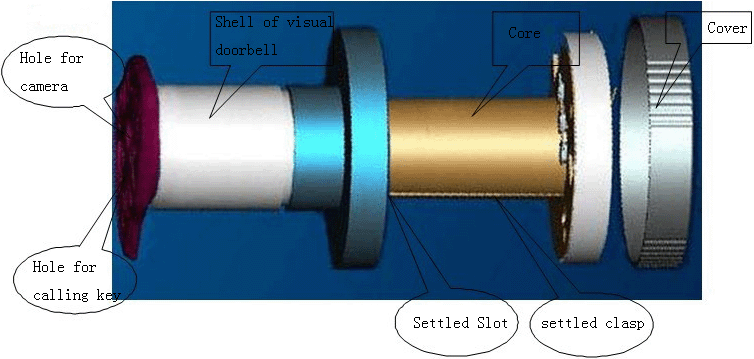
    The visual doorbell is composed of “Shell”, “Cover” and “Core” .Some door already install the “Shell” and “Cover”.
    1. If the door is already with Shell and Cover, Please take off the Cover first.
    2. If the door is without the Shell and Cover, it is necessary to use the Shell of visual doorbell instead of general door eye. This operation should be finished by specialized worker from factory.
    3. Confirm the “Settled Clasp” set in the “Settled Slot”
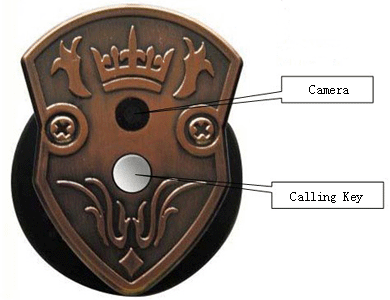
    4. Confirm camera already set in the “hole for camera” and Calling key already set in the “hole for calling key”
    5. Fix “cover” to “Shell”.
  3. Using T-Flash Card
    The storage equipment of this doorbell is T-Flash Card. If the doorbell is without T-Flash Card, the functions, such as MP3 music , Camera and Video, will not carry out. Do use the T-Flash Card approved by the manufacturer
    If use other T-Flash Card:
    The Capacity should be 1G or less 1G Before using the T-Flash Card , Please format the T-Flash Card into “FAT” style , this cooperation can be done in the computer or this doorbell ( Press “Menu” key to “File Manager”—“Format Card” ) Copy MP3 music into “MP3”folder of T-Card , Doorbell save photos into JPG Folder automatically and save Video files into MJP Folder automatically When the doorbell remind “T-Card Full”, please copy all JPG and MJP files of T-card into your computer , at the same time empty the JPG and MJP Folder of T-card .
Brief Introduction
  1. Sketch Map
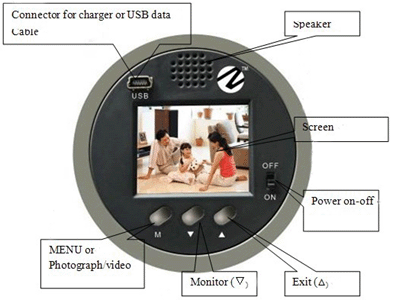
    The back of doorbell The front of doorbell
  2. Main Feature
    1. Using and Setting is simple, convenient
    2. Standby Time reach 45 days
    3. Show clean-cut image
    4. Play liquid MP3 music
  3. Technical Specification
    • Production size:
    • Packing Size :
    • LCD:1.8” 64K 160x128
    • Memory Card:128M T-Flash
    • Standby current:<0.3mA
    • Standby time:>3000Hour
    • Charge time :3Hour
    • Visual Doorbell User Guide
    • Keyboard’s use life:>100K Time
  4. Main Function
    • Automatic photograph and manual photograph
    • 30s silent video
    • MP3 music
    • View photograph from Memory
    • Play video from Memory
    • Charge, USB data read-write
    • Monitor out side environment
Use specification
Turn On the Doorbell, enter Date setting and Time setting first (refer to Clock setting). After Clock setting, the doorbell enter Power-on State, the doorbell will be in Standby state after 30 second


  1. Function Use
    Visual Doorbell User Guide

    The doorbell is in the state of Power-on or Standby, when guest press “calling key“ key, the screen begin to show the outdoor environment, at the same time begin to play MP3 music .
    According to Ring Setting, Play one named music or Play music in regular sequence.
    The Volume of MP3 Music is adjustable from 0 to 15 grade
    The playing time of MP3 Music is adjustable from 5s to 30s
    If “ Shoot Mode” is “Auto” when guest press “Calling key” , the doorbell may save one photo automatically, otherwise press “Menu” key , the doorbell only save one photo
    Press “Menu” key, according to the setting of “record settings”—“record mode”, the doorbell can shoot and save one photo, or shoot and save one video.
    Press “Monitor” key to adjust the focus of camera.
    Press “Exit” key to enter Power-On state, the doorbell will be in Standby state after 30 second.
    When closing the music , if no any operation , the doorbell will be in standby state after 30S
    When the doorbell remind “T-Card Full”, please copy all JPG and MJP files of T-card into your computer , at the same time empty the JPG and MJP Folder of T-card .

  2. Settings
    When the doorbell is in Power-On or in Standby
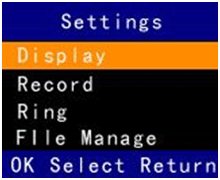
    Press “Menu” key to enter Options Menu (Please see above diagram, it will be shown in the doorbell’s screen), the screen will show Below Menu or enter Operation Menu
    Press “Monitor” key, Cursor may be moved up or down.
    Press “Exit” key to enter Power-On state, the doorbell will be in Standby state after 30 second.
    If no any operation, the doorbell will be in standby state after 30 second.

  3. Display Settings
    Press “menu” key to enter “Display Settings”, see following diagram, there show “Clock Settings”, “LCD Backlight” and “HW Ver” in the screen.
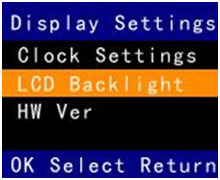

    • Clock Settings
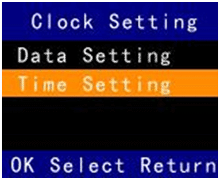
      Press “Menu” key to enter Clock Settings’ below menu, you can deal with the setting of Year, month, Day, Hour and minute.
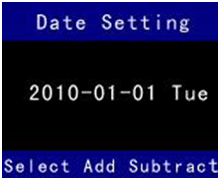
      Date Setting:
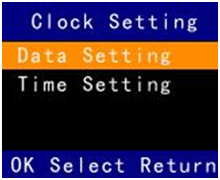
      When above diagram is shown in the screen of doorbell,
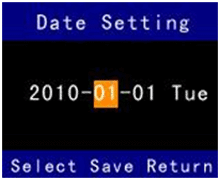
      Press “Menu” key to enter Option, enter operation of “date setting”, just as following three diagrams.
      Press “Monitor” Key, Cursor may be moved up or down.
      Press “Exit” key to enter upper menu, the doorbell will be in Standby state after 30 second
      If no any operation, the doorbell will be in Standby state after 30 second
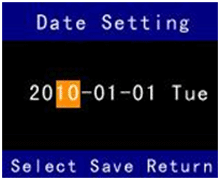
      When the doorbell is in the state just as above three diagrams,
      Press “Menu” key, the Cursor may be moved left or right, then revise the Date.
      Press “Monitor” key to increase the number of Year, Month and Day
      Press “Exit” key to reduce the number of Year, Month and Day
      If no any operation, the doorbell will be in Standby state after 30 second.
      Press “Menu” key continually, the doorbell will be in the state just as below diagram

      In the state as above diagram,
      If press “Menu” key, the Cursor may be moved left or right, then revise the Date.
      If press “Monitor” key, then save the correct date.
      If press “Exit” key to enter upper menu, the doorbell will be in Standby state after 30 second
      If no any operation, the doorbell will be in Standby state after 30 second
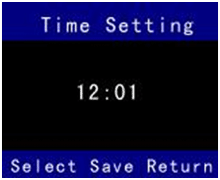
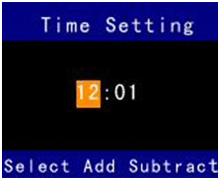
      Time Setting:

      When above diagram is shown in the screen of doorbell,
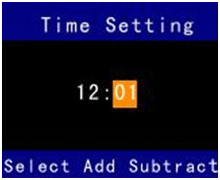
      Press “Menu” key to enter Option, enter operation of “Time Setting”, just as below tow diagrams.
      Press “Monitor” key, Cursor may be moved up or down.
      Press “Exit” key to enter upper menu, the doorbell will be in Standby state after 30 second.
      If no any operation, the doorbell will be in Standby state after 30 second.

      When above diagram is shown in the screen of doorbell,
      Press “Menu” key, the Cursor may be moved left or right, then revise the hour and minute.
      Press “Monitor” key to increase the number of hour and minute.
      Press “Exit” key to reduce the number of hour and minute.
      If no any operation, the doorbell will be in Standby state after 30 second.
      Press “Menu” key continually, the doorbell will be in the state just as below diagram.

      In the state as above diagram,
      If press “Menu” key, the Cursor may be moved left or right, then revise the hour or minute.
      If press “Monitor” key, then save the correct time.
      If press “Exit” key to enter upper menu , the doorbell will be in Standby state after 30 second .。
      If no any operation , the doorbell will be in Standby state after 30 second .
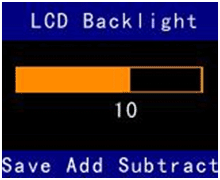
    • LCD Backlight

      When the doorbell enter “LCD Backlight” menu as above diagram,
      Press “Menu” key to save the setting of Backlight and exit this menu entering upper menu. You can choose one restful Backlight from 0 to 15.
      Press “Monitor” key to increase the number of backlight.
      Press “ Exit” Key to reduce the number of backlight
      If no any operation, the doorbell will be in Standby state after 30 second.
    • HW Version
      To guarantee and after service, confirm the edition of software and hardware


  4. Record Settings
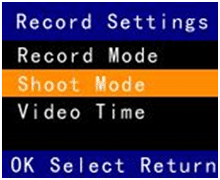
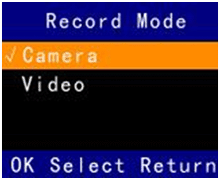
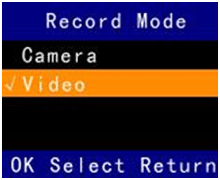
    Press “menu” key to enter “Record Settings”, see following diagram, there show “Record Mode”, “Shoot Mode” and “Video Time” in the screen. 

    • Record Mode

      Press “Menu” key to choose “Camera” or “Video”, default setting is “Camera”. If the option is with the“√”mark , it should be current option .
      Press “Monitor” Key, cursor may be moved up or down. Press “Menu” key to confirm the option with cursor.
      Press “Exit” key to enter upper menu, the doorbell will be in Standby state after 30 second.
      If no any operation, the doorbell will be in Standby state after 30 second.
      Remark:
      Camera:When the guest press “key for call” key, or when the user press “Monitor key to enter “Camera Mode”, User Press “Menu” key to save one photo.
      Video:When the guest press “key for call” key, or when the user press “Monitor key to enter “Camera Mode”, User Press “Menu” key to save one Video.

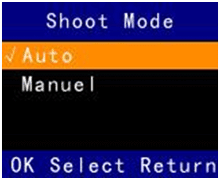
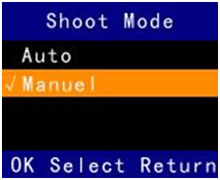
    • Shoot Mode

      Press “Menu” key to choose “Auto” or “Manual”, default setting is “Auto”. If the option is with the“√”mark , it should be current option .
      Press “Monitor” Key, cursor may be moved up or down. Press “Menu” key to confirm the option with cursor.
      Press “Exit” key to enter upper menu, the doorbell will be in Standby state after 30 second.
      If no any operation, the doorbell will be in Standby state after 30 second.
      Remark:
      Auto Mode:When guest press “calling key”, the doorbell save one photo automatically may save one photo.

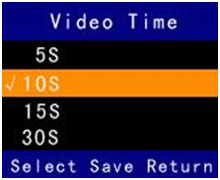
    • Video Time

      Press “Menu” key to choose “5S”, “10S”, “15S”or “30S”, default setting is “30S”. If the option is with the“√”mark , it should be current option .
      Press “Monitor” Key, cursor may be moved up or down. Press “Menu” key to confirm the option with cursor.
      Press “Exit” key to enter upper menu, the doorbell will be in Standby state after 30 second.
      If no any operation, the doorbell will be in Standby state after 30 second.

      Remark:
      If “Record Mode” is “Video”, press “Monitor” key, then press “Menu” key, the doorbell begin to video.
      The video time is according to the setting of “Video Time”. During doorbell’s video , user may stop or exit the video manually

  5. Ring Settings
    Press “menu” key to enter “Ring Settings”, see following diagram, there show “Playing Mode”, “Playing Time” and “Playing Volume” in the screen.
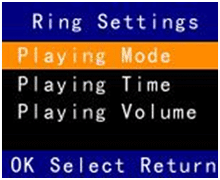

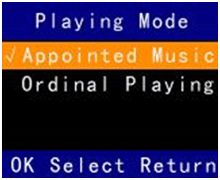
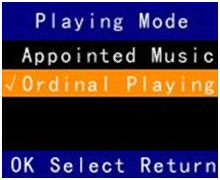
    • Playing Mode


      Press “Menu” key to choose “Appointed Music” or “Ordinal Playing”, default setting is “Ordinal Playing”. If the option is with the“√”mark , it should be current option .
      Press “Monitor” Key, cursor may be moved up or down. Press “Menu” key to confirm the option with cursor.
      Press “Exit” key to enter upper menu, the doorbell will be in Standby state after 30 second.
      If no any operation, the doorbell will be in Standby state after 30 second.

      Remark:
      Appointed Music:When guest press “calling key”, the doorbell will play the appointed MP3 music. When “Appointed Music” with cursor, press “Menu” key, the doorbell will show all MP3 files of T-card, user can choose any one of music.
      Ordinal Playing :When guest press “calling key” , the doorbell play all MP3 music according to the storage’s order

    • Playing Time

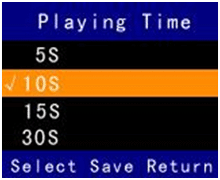
      Press “Menu” key to choose “5S”, “10S”, “15S”or “30S”, default setting is “10S”. If the option is with the“√”mark , it should be current option .
      Press “Monitor” Key, cursor may be moved up or down. Press “Menu” key to confirm the option with cursor.
      Press “Exit” key to enter upper menu, the doorbell will be in Standby state after 30 second
      If no any operation, the doorbell will be in Standby state after 30 second.
      Notice:The doorbell plays the head of MP3 music, if the head of MP3 music is empty, the doorbell maybe no sound.

    • Playing Volume

      Press “Menu” key to save the setting of Volume and exit this menu entering upper menu. You can choose one appropriate Volume from 0 to 15
      Press “Monitor” key to increase the number of Volume
      Press “Exit” key to reduce the number of Volume.
      If no any operation, the doorbell will be in Standby state after 30 second.


  6. File Manage
    Press “menu” key to enter “File Manage”, see following diagram, there show “Photo View”, “Video View”, “Udisk Mode” and “Format Card” in the screen.
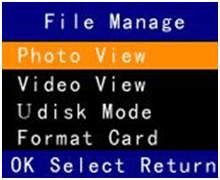
    • Photo View

      Press “Menu” key to enter “Photo View”, and the doorbell show the latest photo:
      Press “Menu” key to show previous photo
      Press “Menu” key to show next photo
      Press “Exit” key to enter upper menu, the doorbell will be in Standby state after 30 second
      If no any operation, the doorbell will be in Standby state after 30 second.

    • Video View

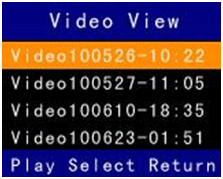
      Press “Menu” key to enter “Video View”, the doorbell show the list of Video with shotten time
      Press “Menu” Key to play the Video with cursor
      Press “Monitor” key , cursor may be moved up or down
      Press “Exit” key to enter upper menu, the doorbell will be in Standby state after 30 second
      If no any operation, the doorbell will be in Standby state after 30 second.
    • U-disk Mode

      Press “Menu” key to enter “Udisk mode”. Under this state, using the USB Data cable to connect the doorbell with computer, then user can check and delete the photo, video in the doorbell from the computer, user can add and delete the MP3 music in the doorbell from the computer.
      Press “Exit” key to enter upper menu, the doorbell will be in Standby state after 30 second When blue light is bright, USB cable connect with computer correctly, at the same time, the computer charge for the doorbell.
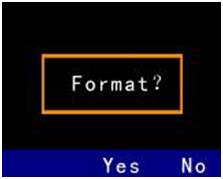
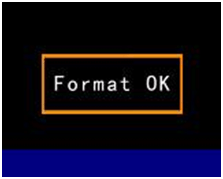
    • Format Card

      Press “Menu” to enter “Format Card”

      Press “Monitor” key to confirm “Format” , when finish the format , the doorbell will show “Format OK”
      Press “Exit” key to enter upper menu, the doorbell will be in Standby state after 30 second
      If no any operation, the doorbell will be in Standby state after 30 second.

  7. Monitor
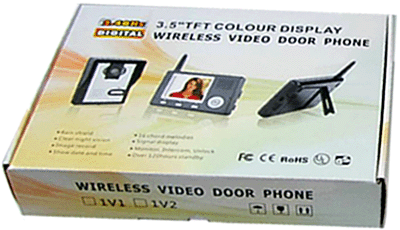
    When the doorbell is in Power-On or in Standby, Press “Monitor” key to monitor the outdoor environment, Press “Menu” key to shoot or video, Press “Exit” key to enter Power- on state, the doorbell will be in Standby state after 30 second
    If “record mode” is “camera”, press “Menu” key to save one photo
    If the “record mode” is “video” , press “Menu” key to save one video, the longest time for shooting is 30S
    Press “Monitor” key to adjust the focus of camera.
    Press “Exit” key to enter power-on state, the doorbell will be in Standby state after 30 second
    If no any operation, the doorbell will be in Standby state after 30 second.
  8. Charge
    Use Charger or connect computer by data cable.
    When charge the doorbell, the red light must be bright if the doorbell is open. When full, the red light must go out.
    When charge the doorbell, the red light also go out if the doorbell is close.

Doorbell, Digital Wireless Monitor 7% listed
About | More | Contact
1999~2021 © TradeSalon ®