Underground Metal Detector TradeSalon.Net
MD1020 MD3080 MD1023 MD5008
MD5000 MD3009II MD3010II MD6051
More Porducts Enter


MD1020
  • Introduction:
    Top quality Micro Processor controlled metal detector. Auto ground balancing. Light weight and modern design. Tone and digital discrimination with Notch filter function.
    The digital LCD display will tell you what you have found when hunting in areas with lots of trash metals. The coil is water proof so it can be used in the surf at the beach

  • Specifications
    1. Power supply: 18V(Two 9V batteries required), static current < 30 mA
    2. Operation Frequency: 6.4KHz ~ 6.8KHz
    3. Operation modes: ALL METAL, DISC, NOTCH
    4. Target Indications: Audio -1.2" speaker or earphone jack
    5. 75×32 mm LCD
    6. LCD display: Operating Mode Identification of metal target DEPTH SENS position DISC/NOTCH range Low BATT
      - Touch pad can adjust SENS , DISC/NOTCH and VOLUME
      - Sensitivity: max depth > 6 inch for a US quarter
      - Three tones for different metal targets in DISC mode
      - Motion discrimination
      - Auto ground balance
      - 8" waterproof search coil
      - 3.5mm earphone jack (earphone not included)
      - Comfortable arm support, adjustable aluminum stem
      - Two 9V batteries required

MD3080
Specifications:
  • Detection depth: 50 cents = 18cm
  • Detecting length for underwater: =40m
  • Power supply: 1 piece of 9V battery
  • Current consumption: 16mA (stand by current)
  • Operation temperature: -10°C to 50°C
  • Adjustable handles: 104 - 124 cm
  • Size of search head: 10 inches
  • Weight: 1.8kg
  • Application:
    Treasure hunters
    Sports divers
    Archaeologists
    Miners
    Underwater construction companies for pipeline or cable locating functions
    Underwater search and recovery teams
    Military and law enforcement personnel

    Packing 10PCs/carton, Gross weight 33KG
    Introduction:
    • Treasure Chest Underwater Metal Detector.
    • A great portion of lakes, rivers and oceans remain relatively untouched.
    • It has been said that more than 75% of shipwrecks had occurred before the last century and many of these have gone unexplored with underwater metal detectors, it has become much easier to explore sunken treasures.
    • It is RoHS compliant and it carries CE approvals.
    • sable underwater to 40 meters safely, the Treasure Chest Underwater Metal Detector is designed for hunting in deep water, surf and shallow waters as well as hunting on land with equal sensitivity.
    • Special unique features and the full protection of the encapsulated double impermeable designed aluminum casing allows these detectors to search in the water to recover hundreds of thousands of coins, relics, rings, and jewellery beyond the reach of the standard or all-purpose land metal detectors.
    • Designed for both salt and freshwater environments, the underwater metal detectors can satisfy any special needs of the marine treasure hunter. When the unit detects metal targets, a red light appears and an alarm begins to ring.
    • It has a full range of varying metal detecting functions and has the advanced function of a fully adjustable target elimination capability to eliminate ferrous metals
    • Features:
      1. Waterproof and compact design
      2. Excellent for treasure-hunting in the sea/underwater while diving
      3. Submersible to a maximum depth of 40 meter / 120 feet
      4. Aesthetic outlook, aluminum material increases safety factor
      5. Adjustable sensitivity control
      6. Can be set to ignore small metal pieces while looking for larger objects
      7. Fully adjustable target elimination capabilities to eliminate "trash"
      8. Easy start up operation
      9. Red light and audible alarm
      10. Headphone ear cups have heavy duty polymer surrounds and noise blocking features
      11. Automatic low voltage alarm
      12. Adjustable handles for comfortable use
      13. Audible alarm and visual red LED flash
      14. Aluminum control tube instead of plastic box
      15. Discriminates between different kinds of metals


    MD1023
    • Introduction:
      1. Time Saver Metal Detector Auto Ground Balance Control Tone Discrimination Water Proof.
      2. With Pin pointing Function the ground Balance is fully automatic in this mode.
      3. Motion Discrimination - While the detector is in motion it will emitted different tones based on the metal type detected.
      4. The signal strength will also be displayed.
      5. The sensitivity and Discrimination levels are fully adjustable.
      6. The ground Balance is fully automatic in this mode.
      7. Tone Discrimination - In this mode the detector will emitted a high or low tone based on the target type.

    • Specifications
      1. 3.5mm earphone jack
      2. Auto ground balance
      3. Motion discrimination
      4. Low battery indication
      5. Low battery indication
      6. 8 inch waterproof search coil
      7. Operation Frequency: 5KHz ~ 6.5KHz
      8. Knobs for adjustment: SENS , DISC/TONE
      9. Operation modes: ALL METAL, DISC, TONE
      10. 1/8 inch earphone jack (earphone not included)
      11. Two tones for different metal targets in TONE mode
      12. Comfortable arm support, and adjustable aluminum stem
      13. Power supply: Two 9V batteries required, static current < 15 mA
      14. Target Indications: Audio -1.2 speaker or earphone jack View meter
      15. Pinpoint: max depth > 16cm, help to find the accurate place of target
      16. Sensitivity: max depth > 8 inches (20cm) for a US quarter in ALL METAL mode
      17. Advanced discrimination ability: can discriminate between aluminum and silver

    MD5008


    FEATURES
    With your MD-5008 Metal Detector, you can hunt for coins, relics, jewelry, gold, and silver, etc, just about anywhere. The metal detector is versatile and easy to use.

    The detector' features include:
    Headphone Jack
    lets you connect headphone ( not supplied ) to the detector.
    View meter and Pointer
    gives off tune of fixed frequency while finding metal.
    Waterproof Search Coil
    lets you use the detector"s length for comfortable use.
    Note:
    The search coil is waterproof, but the control housing is not waterproof.
    Adjustable Stem
    lets you adjust the detector"s length for comfortable use.
    Note:
    your metal detector requires 8 pieces of 1.5 V batteries.

    TREASURE HUNTER"S CODE OF ETHICS

    All treasure hunters might be judged by the example you set.
    Here are a few basic rules you should follow while using your detector.

    • Always get permission before searching any site
    • Respect the rights and property of others.
    • Observe all national, state, and local laws while treasure hunting.
    • Never destroy historical or archaeological treasures. If you are not sure about an object your have found, contact a museum or historical society in your area.
    • Leave the land and vegetation as it was. Fill in any hole you dig.
    • Use your detector only in safe areas
    • Dispose of any junk you find, only in approved areas. Do not leave it for the next treasure hunter to find.
    Contents
    1. Preparation
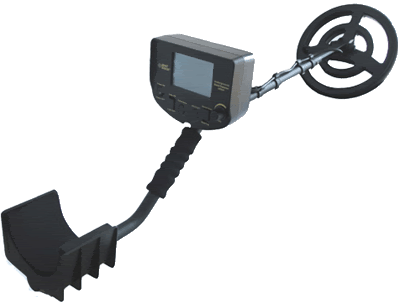
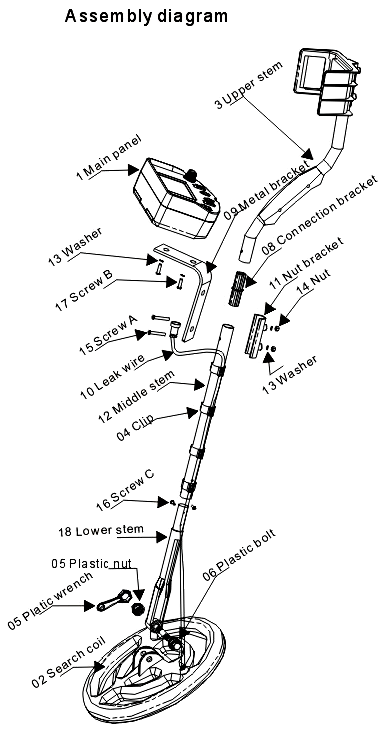
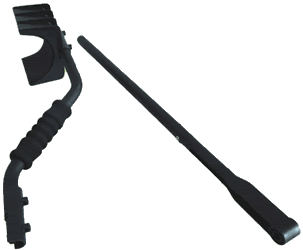
      • Assembling the Detector
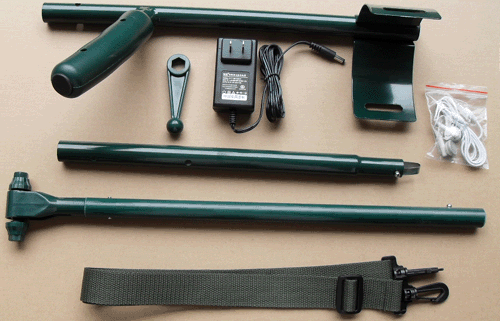
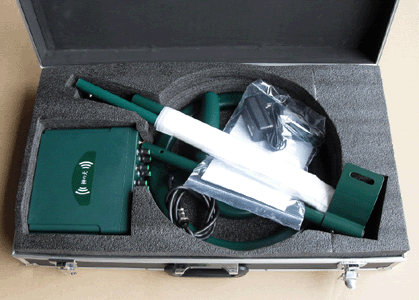
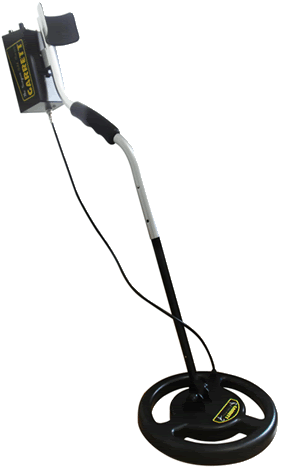
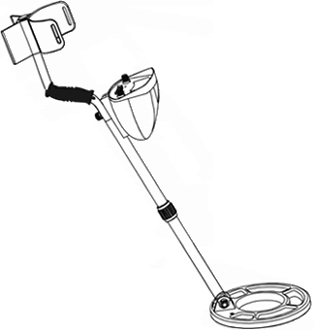
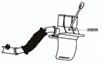
        Assembling your detector is easy and requires no special tools. Just follow following steps:
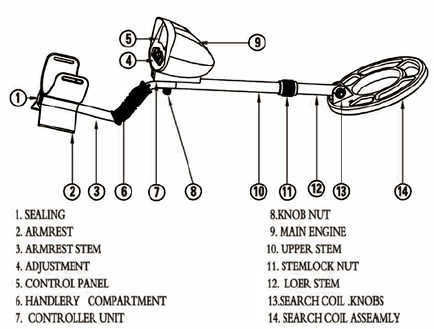
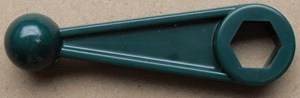
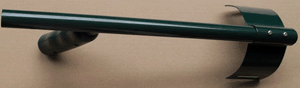
        1. Turn the stem"s lock nut clockwise until it loosens
        2. Lengthen or shorten the stem so when you stand upright with the detector in your hand, the search coil is level with and about 8 inches above the ground with your arm relaxed at your side
        3. Turn the stems" lock nut counterclockwise to lock it in place.
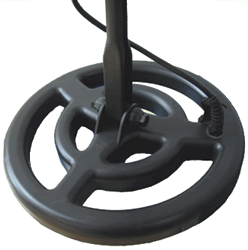
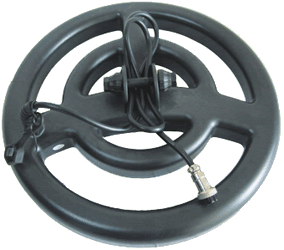
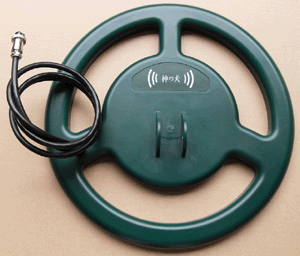
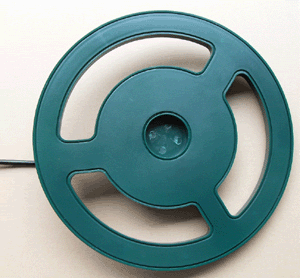
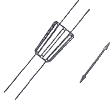
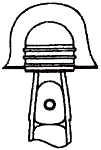
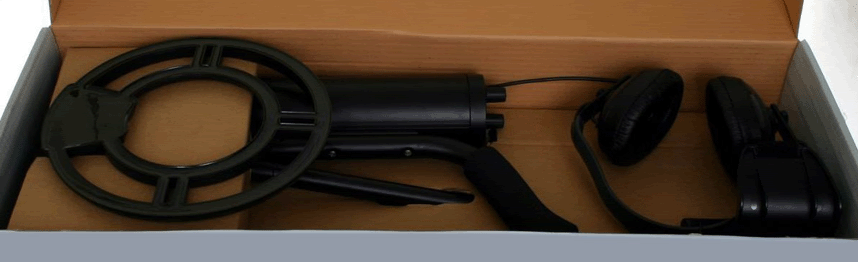
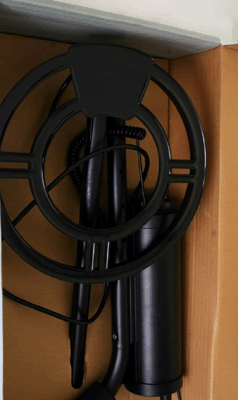
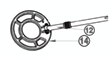
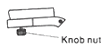
        4. Unscrew the knob on the search coil and remove the knobs and connector. Insert the stem and align the holes on the search coil bracket and the stem. Push the connector through the holes and tighten the knob.
        5. Wind the search coil cable around the stem. Leave enough slack in the cable to let you adjust the search coil when you are hunting on uneven ground .
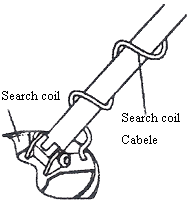
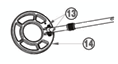
        6. Insert the search coil"s plug into the search coil jack on the detector"s control housing. Be sure the pins on the plug align with the holes in the jack.

          Cautions:
          • The search coil"s plug fits into the connector only one way. Do not force the plug or you could damage it.
          • To disconnect the search coil"s cable form the detector, grasp the plug and pull it out of the connector. Never pull on the cable.
        7. Loosen the knob at the search coil"s end, then adjust the search coil to the desired angle. ( The search coil should be parallel with the ground.) Tighten the knob just enough to keep the search coil from rotating or wobbling.
          Caution:
          1. Do not over tighten the search coil or use tools such as pliers to tighten it.

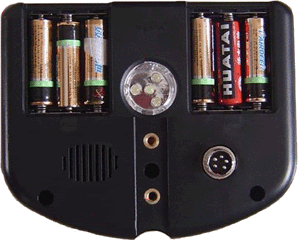
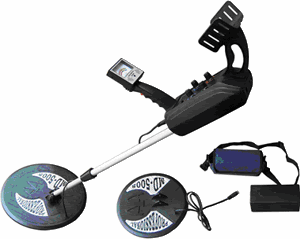
      • Installing Batteries
        Your need 8 Pieces of 1.5V batteries to power your detector

        Cautions:

        • Use only fresh batteries of the required size and recommended type.
        • do not mix old and new batteries, different types of batteries ( standard, alkaline, of rechargeable ), alkaline, or rechargeable ), or rechargeable batteries of different capacities.
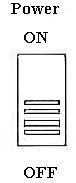
        1. If the detector is ON, turn it to OFF
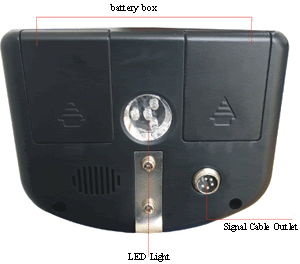
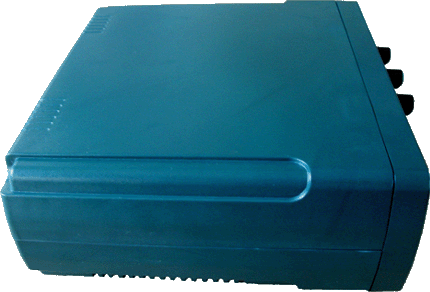
        2. Press the right battery compartment cover"s tab and slide the cover off in the direction of the arrow
        3. Place 4 pieces of 1.5V battery into the battery compartment on top of the ribbon, matching the polarity symbols ( + and - )
        4. Replace the right battery compartment cover
        5. Press the left battery compartment cover"s tab and slide the cover off in the direction of the arrow
        6. Place 4 pieces of 1.5V batteries into the battery compartment on top of the ribbons, maching the polarity symbols ( + and - ) marked.
        7. Replace the left battery compartment cover.

        Cautions:

        • Always remove old or weak batteries; batteries can leak chemicals that can destroy electronic parts
        • If you do not plan to use the detector for a week or more, remove the batteries
        • Dispose of old batteries promptly and properly

        You can extend battery lift by using headphones, which require less power than the built-in speakers

        TESTING THE BATTERIES
        If the indicator light is dim or dark, so the detector does not turn on, has weak volume, will not tune properly, has erratic operation, or drifts. Replace the batteries.
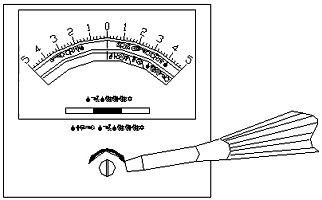
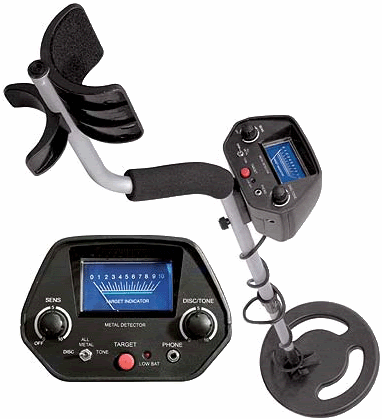
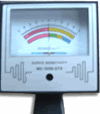
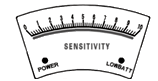
        ADJUSTING THE METER
        With MODE set to OFF, use a screwdriver to adjust the alignment control until the pointer lines up with ) on the scale.
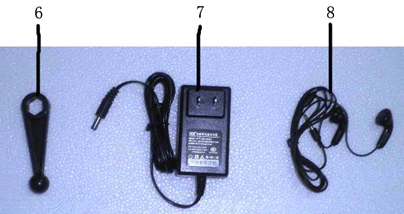
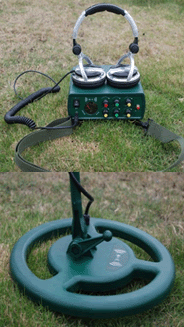
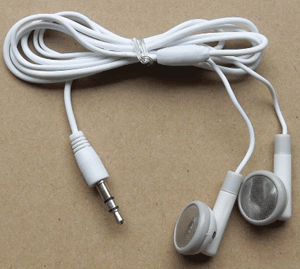
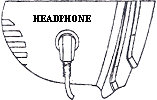
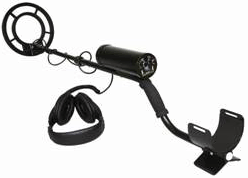
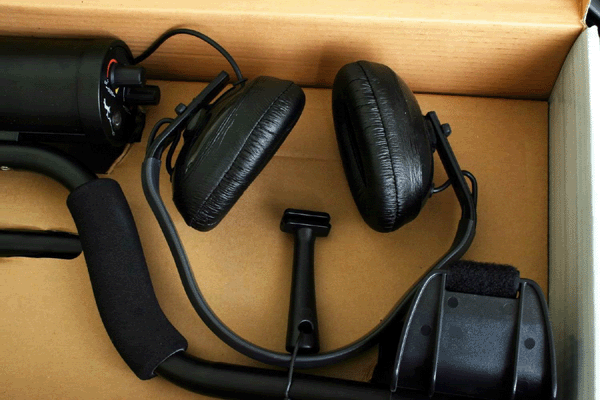
      • Using Headphones

        You can connect a pair of stereo headphones ( not supplied ) to the detector so you can listen to it privately. Using headphones also save battery power and makes it easier to identify subtle in the sounds you hear, for better detection results.

        To connect headphones to the detector, insert the headphones" 1/8 inch plug into the headphone jack on the side of the control housing.

        The detector"s internal speaker disconnects when you connect headphones.

        1. Listening Safely
          To protect your hearing, follow these guidelines when you use headphones.
          1. Set the volume to the lowest setting before you begin listening. After you begin listening, adjust the volume to a comfortable level. Do not listen at extremely high volume levels. Extended high volume listening can lead to permanent hearing loss.
          2. Once you set the volume, do not increase it . Over time, your cars adapt to the volume level, so a volume level the doesn"t cause discomfort might still damage your hearing.
        2. Traffic Safety
          Do not wear headphones while operating your detector near high traffic areas.

          Even though some headphones are designed to let you hear some outside sounds when listening at normal volume levels, they still can present a traffic hazard.
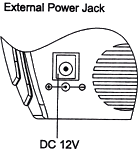
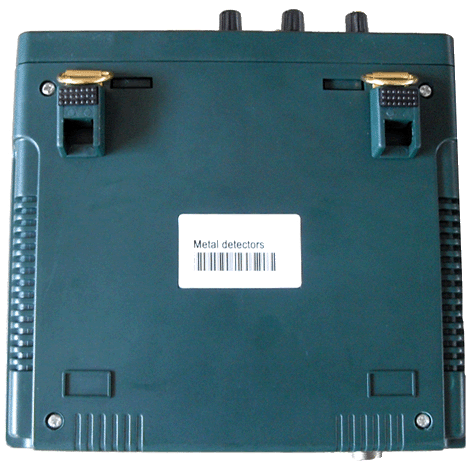
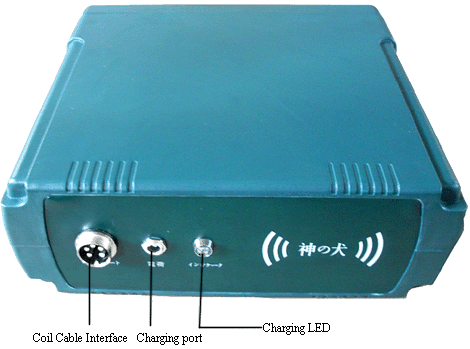
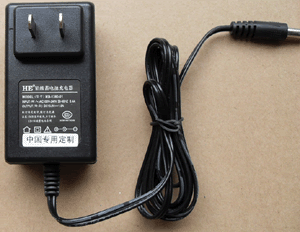
      • External Power Jack

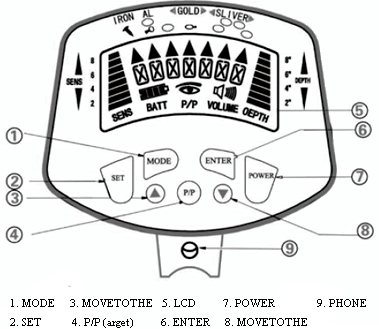
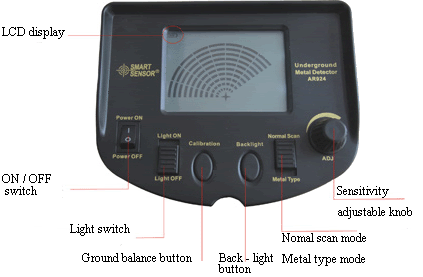
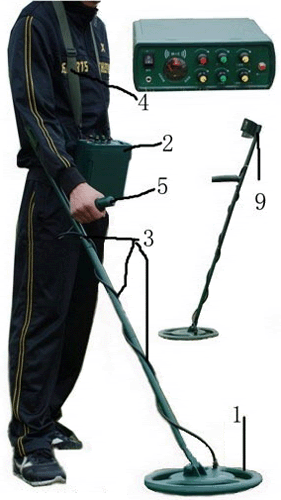
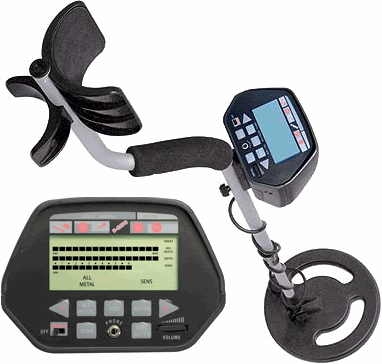
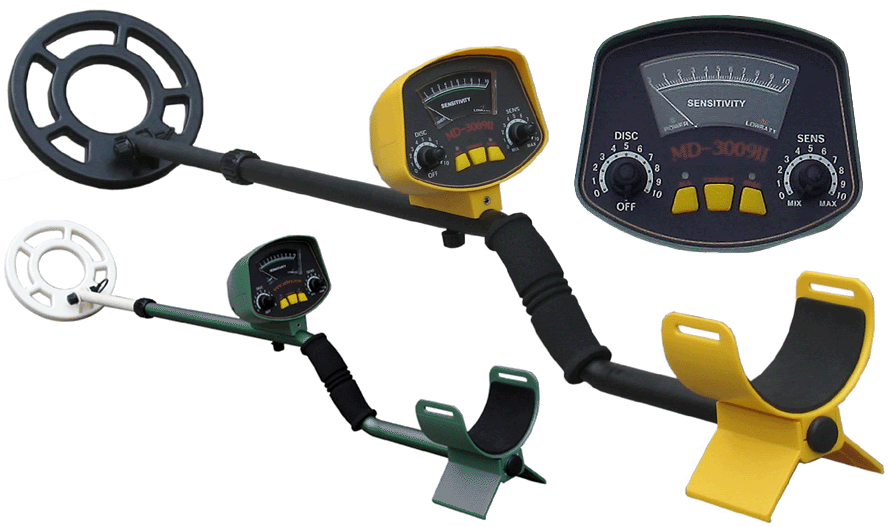
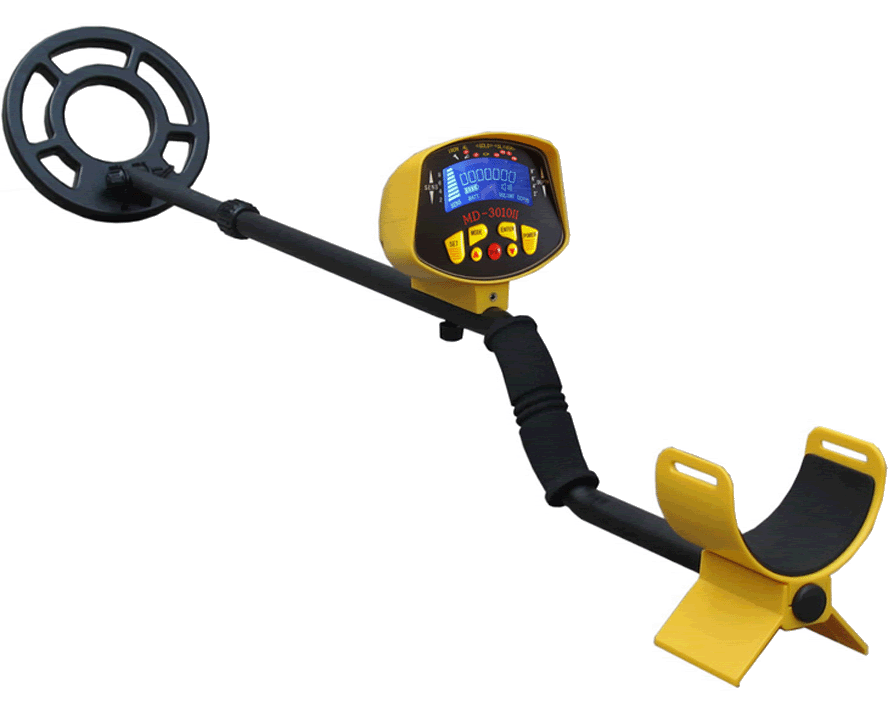
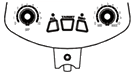
    2. Introduction of Operation Buttons
      • Zeroing Button
        Zeroing Button is at the forefinger"s position when holding the detector. Press it, the pointer of the view meter returns to "0" position.

        zeroing Button has memory function, so it can memorize the working circumstance at working time. For example, while holding the search coil over the ground, the ground emits signal to make the pointer leave "0" position, you can return it to "0" by pressing the Button again. Then you can begin detecting.

        Don"t press the Zeroing Button near metal, or the detector can not detect metal any longer.

        What must be pointed out is the you must press the Zeroing Button before adjusting any other turn button, then relieve it after finishing adjusting.

        During detection, with the changes of environment, the pointer often leaves "0" position. Pressing Zeroing Button to return the pointer to "0", so you must often press it during the detection process.

        The detector need about one minute to preheat after turning on the detector, or the pointer will leave "0" after pressing the Zeroing Button. All will be normal after preheating.
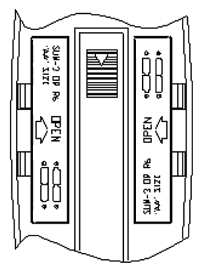
      • Tune Turn Button
        Adjust the TUNE, the sound rises slowly, the sound which just can be heard is called "critical sound" The detector has the highest sensitivity when it is at " critical sound"
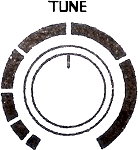
        Note:
        1. Press the zeroing Button before adjusting the "critical sound" and set free it after adjusting.
        2. If the "critical sound" rises, falls, or disappears, set it by pressing the Zeroing Button.

      • Sensitivity Turn Button Sensitivity Turn Button controls the sensitivity of the detector.
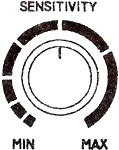
        1. rotate it counter-clockwise to the end point, the sensitivity is MIN and the detection depth is MIN; rotate it clockwise to the end point, the sensitivity is MAX and the detection depth is MAX, To set sensitivity depends on the testing circumstance. But not the higher, the better.
        2. for example, in those heavy mineralization area, high sensitivity causes false signal, the detector sounds everywhere so that the detector can"t find target correctly In such condition, lower the sensitivity to reduce the effect caused by complex soil; in those pure area, the higher the sensitivity, the stronger the detection.
        Note:
        Press the Zeroing Button before adjusting the sensitivity and set free it after adjusting.

      • Ground Balance Turn Button
        Owing to The "mineralization reaction", the search coil of old style metal detector emits false signal, and the "critical sound" is affected by the change of the distance between the search cool and the ground, so you can/t distinguish the type of the signal ( minerlization signal or metal signal ). To solve such problem, Ground Balance Circuit is designed to decrease the "mineralization reaction" to the lowest

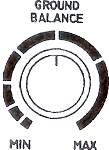
        Set Mode to GROUND BALANCE, then tune the ground balance turn button.

        Rotate the ground balance turn button to MAX, raise the search coil, then lower it after setting the "critical sound", the volume rises; Rotate the turn button to MIN, then do as above, the sound falls, This experiment confines that the volume change while rotating GROUND between two sides of the scale, so there must be appoint at which the sound keeps steady, this point is the "ground balance point" we set.

        Follow these steps to set "Ground" Balance Point":

        1. Set MODE to "GROUND BALANCE"
        2. Stop the search coil about 24 inch above the ground, set the "critical sound"
        3. Lower the search coil about 8 inch above the ground; if the volume rises, raise the search coil ( about 24 inch ) and rotate the turn button counter clockwise to try, if the volume falls, rotate it counter-clockwise a little till the sound gets steady. If the volume falls when we do as above, rotate it clockwise till the sound gets steady.
        4. No matter you tune the volume, it still rises, witch expresses there are metals in this area, try another area to adjust.
        5. Press the "Zeroing Button" firstly before raising the search coil to set the "Ground Balance", lower the search coil after tuning the "Ground Balance" and relieving the "Zeroing Button"

        The detector eliminates the "minerlization reaction" signal after setting "Ground Balance" as above, the searching coil can sweep the ground freely and only sounds while finding metal

      • Discrimination Turn Button
        The discrimination Turn button is used when MODE is set to "DISCRIMINATION"

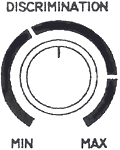
        When we rotate the "BISCRIMINATION" to different position, we can distinguish between ferrous metal and non-ferrous metal by direction to which meter pointer swings.
        NOTE: press "Zeroing Button" before adjusting "DISCRIMINATION" and relieve it after adjusting.

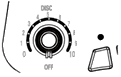
      • Operation Mode Switch (MODE)
        there are two sections in operation mode switch, one is GROUND BALANCE, and the other is "DISCRIMINATION"

        Set MODE to "GROND BALANCE", the detector responds to all metals, has no discrimination function, but can eliminate the effect of "mineralization reaction" has enough penetrability, works steadily, and indicates properly, so this mode is usually selected at the beginning of detecting some area.

        Set MODE to "DISCRIMINATION" the detector can distinguish the type of the metal and select the bigger and valuable metal.

    3. Actual Detection Operation
      • Preparation
        Place batteries into the battery compartment, turn on the power supply switch, the detector is electrified to work. The pointer is usual not at the center of the view meter when detector is just on, but swings to one side. This expresses tat the detector is not in a steady mode, you need to press and relieve the "Zeroing Button" a few times until the pointer doesn"t drift any longer. All of these are normal phenomena. The detector needs a short time to preheat, during this period, the search coil should rest over the ground and begin to work only after the pointer return to "0" position. Watch the indictor light when you press the button, if the light is dim or dark, replace the batteries

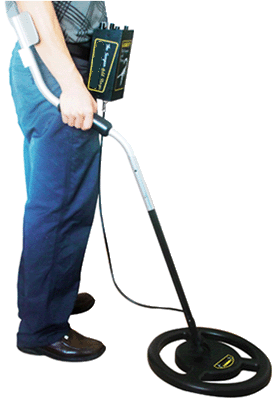
        In detection, the operator holds the handle and sweeps slowly the search coil above the ground, keeps the search coil 8 inch above the ground. When finding metals, the detector responds and the view meter indicates change.

        Remove any watch, ring, metal button, cigarette box, etc you are wearing, and wear shoes without iron nail.

      • Ground Balance Mode
        This mode can eliminate the "mineralization reaction" and has better penetrability, so this mode is preferentially selected wherever indoor or outdoor search. In this mode, as long as the search coil is moved right over the target, the detector sounds and the view meter indicates the change, and type of metal raises the volume.

        Follow these steps to set it:

        1. Turn on the switch
        2. Set the MODE to "GROUND BALANCE"
        3. Stop the search coil 24 inch above the ground, press and relieve the "Zeroing Button" for several times to preheat the detector until the pointer returns to the "0"
        4. Set the "critical sound"
        5. Set "GROUND BALANCE" as mentioned above
        6. Sweep the search slowly along the ground and keep 8 inch above the ground.

      • Discrimination Mode
        This mode is used to distinguish ferrous metal and non-ferrous metal, to select bigger metal and to eliminate smaller ones between the same type of metals. This mode hasn"t "GROUND BALANCE" function, so the "mineralization reaction" is heavy, the operator should use it carefully.

        Follow these steps to set it:

        1. Turn on the switch
        2. Set "MODE" to "DISCRIMINATION"
        3. Preheat
        4. Set the "critical sound"
        5. Distinguish ferrous and non-ferrous metal:
          1. If you turn the discrimination turn button to MAX position, the pointer will rotate to right when you detect the non-ferrous metal, simultaneously, the detector sound will raise.
          2. Eliminate unneeded target:
        If detect indoor or search very trashy ground, there are a lot of metal trash, they are usual no use and can be eliminated during the detection.

        For example, in an area full of iron nail, the iron nail"s signals can interfere the detection, to solve such problem, you can firstly put a iron nail on the ground and let the search coil sweep over it, if the sound increase, press the button and rotate the "DISCRIMINATION" clock-wise a little, relieve the button and try again; adjust repeatedly until the sound doesn"t change when the detector sweeps over the iron nail.

        After adjusting. The detector doesn"t respond to iron nails and ferrous metals whose size are smaller than iron nail buried in the ground, but it can respond to all non-ferrous metals and ferrous metal whose size are bigger than iron nail

    4. Detection Notes
      • Indoor Testing and Use
        1. Remove any watches, ring, or other metal jewelry you are wearing, then place the detector on wooden or plastic table
        2. Adjust the search coil" angle so the flast part faces the ceiling.


          Note:

          1. Never test the detector on a floor inside building
          2. Most buildings have metal of some kind in the floor, which might interfere with the objects you are testing or mask the signal completely
        3. Move a sample of the material you want the detector to find ( such as a gold ring or a coin ) about 2cm above the search coil
          Note:
          1. The search coil will not detect without motion. You must mover the object since you are not sweeping with the detector at this time
          2. If you are using a coin, the detector detects it more easily if you hold it so a flat side ( not the edge ) is parallel with the flat side of the search coil
      • Outdoor Testing and Use
        1. find a area on the ground outside where there is no metal
        2. Place a sample of the material you want the detector to find ( such as a gold ring or a coin ) on the ground. ( if you are using valuable metal such as gold to test the detector, mark the area where you placed the item, to help you find it later. Do not place it in tall grass or weeds )
        3. While holding the search coil level and about 8 inches above the ground, slowly move the search coil over the area where you placed the sample, sweeping the search coil in a side-to side motion.
        4. Try finding other metal in the area. When you find a metal item, wait a few seconds after the tone stops before continuing, to allow the detector time to reset (or, press the Zeroing Button to return the pointer to "0" position )
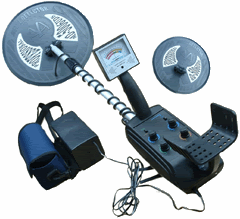
    5. Main Tech Parameter
      Emitting Frequency 6.99KHz
      Signal Frequency 437Hz
      Weight 2.8Kg
      Sensitivity Small coil 25-30 cm ( test 25 US cent )
      Big coil: 35-40 cm ( test 25 US cent )
      Max Detection
      Small coil: 1.5 meters
      Big coil: 3.0-3.5meters
      This conclusion is elicited by testing a aluminium sheet
      ( 60 cm × 60cm × 1cm ) buried in dry soil
      Power Supply 8 pcs 1.5V Batteries and Attach external battery box and bag.

    6. Care and Maintenance
      1. If the detector doesn"t work properly, it is possible that the batteries haven"t enough power, replace batteries to try
      2. Place batteries matching the polarity symbols ( + and _ ) if you won"t use it for a long time, take out the batteries to avoid putridness
      3. The search coil"s plug should be not affected with damp, or the detector will loss detection ability; the plug can be used only after drying in such condition
      4. The detector is prohibited to work in rainy day and in burning sun
      5. The search coil should be far away from furnace and other high temperature circumstance
      6. Each detector is attached a piece of guarantee and it is free to be repaired during the length of warrantee unless the circuit is changed by user himself

    Scorpion Gold Stinger:
    1. high sensitivity
    2. good looking.
    3. Wherever there is gold to be found, the Scorpion Gold Stinger will seek it out
    4. Groundhog (15kHz) circuit is renowned over the world for its power in driving through ground minerals to pinpoint the tiniest gold nuggets
    5. The Gold Stinger has been proven around the world as the universal gold detector
    Package: 5PC/Carton
    Carton size: 58×40×82 cm
    Gross weight: 18KG
    • The Stinger offers three versatile modes unmatched by other gold hunting detectors.
    • It's a deep-seeking gold-finder, but this instrument also offers a hunting mode with the precise discrimination demanded by veteran coin-finders.
    • When you're not locating gold nuggets, use your Scorpion Gold Stinger to locate coins, jewelry or any other kind of treasure. Just switch modes, set your discrimination controls, and start hunting for coins, jewelry, and rings.
    • With Golden Scorpion's highly maneuverable 3 × 7" elliptical search coil you can find nuggets and tiny flakes, or you can use the 5 × 10" elliptical search coil to locate nuggets to extreme depths. Plus, the agility of both size coils among rocks is undisputed.
    • Another feature from Golden Scorpion is the Stinger's TR Disc mode which provides precise calibration necessary for effective ore sampling and hot rock rejection.
    • Scan all day with the lightweight pistol-grip configuration. Or, enjoy the benefits of hip-mounting the control housing for absolute minimum weight.
    1. host
    2. Search coil
    3. Upper stem
    4. Armrest stem
    5. data interface
    6. Satisfy
    7. probe screws
    Specification:
    MD5000 is enable to localize a coin at the depth of 30 to 35 cm ( 12 to 14 inch ), a precious metal deposit or antique hidden treasure at around 2.5 m (8.2 feet), or an even deeper target with the use of the Frame coil. Nothing can escape the Scorpion Gold Stinger
    • Frequency: 9.6KHz
    • Audio frequency: 400Hz to
    • Working voltage: DC12V (built-in rechargeable battery)
    • Power: 0.8 W
    • Connecting Rod: 1.3 m
    • Net Weight: 3KG
    • 5"x10" 2D Elliptical Coil and/or 3"x 7" 2D Elliptical Coil
    • Instructional / field search Video
    • Requires 3PCs 9 Volt batteries
    • 10 Turn Ground Adjustment
    • Convertible Design: on shaft or "hip-mount"
    • Accepts Multiple Coils
    • Identifies Hot Rocks
    • Weather Resistant Controls
    • Submersible Search Coil
    • Discrimination Adjustment for Coin and Relic Locating


    1. Introduction Thank you for purchasing our metal detector. With this powerful and versatile device, you can hunt for coins, relics, jewelry, gold, and silver anywhere. The detector is versatile and easy to use. This unit has an auto ground balance used in Disc and All metal Modes.
      Features
      • Fully automatic 每 a- turn 每 on 每 an d 每go 每 detector.
      • Zero Motion targeting function for 每 precisely locate a target.
      • View Meter 每 Can be used in a noisy area, where it is difficult to hear.
      • All Metal 每 push- key switch made of metal and metal identifying switch. These to parts particularly provides more convenience to the user.
      • No Clumsy Slack Cable 每 hidden search coil cable ( connecting between control unit and search coil ) avoid entangling and for ease of stem length adjustment.
      • Low battery alarm 每 automatic audio alarm and red power spot efficiently remind the user to change the battery in time.
      • Headphone Jack 每 provided for headphone connection. Both stereo or mono headphone can be used.
      • Waterproof search coil 每 lets you use the detector in the shallow water.
      • Adjustable stem- lets you adjust the detector's length for comfortable use. The micro- plug that connects the search coil and the controller unit is made of metal which makes the plug more reliable.
      • Armrest & stem- designed to eliminate strain on forearm. The nylon bracket to further secure the slip of the hand compartment after long time holding the detector by arm.
      • Power 每 use six 1.5Volt AA alkaline batteries.


      MD3009II
    2. Parts and Names

      Nomenclatures
      1. Sealing
      2. Armrest
      3. Armrest Stem
      4. Adjustment
      5. Control panel
      6. Handlery compartment
      7. Controller unit
      8. Knob Nut
      9. Main Engine
      10. Upper Stem
      11. Stem lock Nut
      12. Lower Stem
      13. Search Coil Knobs
      14. Search Coil Assembly
      Features:
      The metal detector is intended for finding of black, color metals, (including gilded and nuggets), based in soil at depth up to 200 cm for big objects and possibility of searching in water at depth up to 40 cm to (submersion of metal detector) The instrument has a system Pinpoint for discovering purposes. Motion Detector, Auto turning of soil, Level to discriminations, Built-in speaker, Feeding 2×9 V, Output on earphones. This metal detector comprises of itself all comforts of adjustment. Adjustments: Ground Balance - auto, Discrimination, Sensitivity - depth, Battery test.

    3. Preparation
      1. Assembling the detector
        You don*t need any special tools to assemble your metal detector. All you need is a small Philips 每 head screw driver. After unpack your detector, you may start the following assembling and adjustment.
        1. Rotate the STEM LOCK NUT (11) Clockwise until loosens.
        2. Slide the UPPER STEM (12) towards the SEARCH COIL (14) as indicated by an arrow until you can see a micro- plug metal connector. Pull out the plug so that you can hold it on your hand.
        3. Locate the micro- jack connector in the HANDLE ASSEMBLY (6). Connect the plug and the jack together and care of alignment marks showing on the surface of the jack and plug.
        4. Slide the UPPER STEM (10) towards to the CONTROLLER UNTI. Cares should be taken for the direction of the cut slot (of the upper stem) which should be pull underneath the support of the controller unit.
        5. Tighten the KNOB NUT which is located under the CONTROLLER UNIT (7)
        6. Adjust the LOWER STEM (12) so that when you stand upright with the detector in you hand, the SEARCH COIL (14) is level with and about 1/2 to 2 inches above the ground with your arm relaxed at your side
        7. Tighten the SETM LOCK NUT (8) in reverse direction (counterclockwise) to lick it in place.
        8. Loosen the SEARCH COIL KNOBS (13) at the SEARCH COIL ASSEMPLY (14), then adjust the search coil to the desired angle. ( The Search Coil should be parallel with the ground.) Tighten the knobs just enough to keep the search coil from rotating or wobbling.
        9. Loosen the 1 screws at the bottom of the ARMEST. Adjust the armrest so that it should be near to the end of your forearm. Tighten the 1 screws in the reverse direction.

      2. Installing batteries
        You need 6 1.5V AA alkaline batteries to power your detector.
        1. Turn the Disc dial anticlockwise to the OFF position to make sure that the detector is OFF.
        2. Slide the battery cover away from the BATTERY COMPARTMENT (9)
        3. Insert 6 new batteries into the BATTERY COMPARTMENT. Cares should be taken for the polarities symbols (+and- ) which are marked on the connection terminals of the detector and the batteries. The polarities of the battery must be matched with the polarities of the terminals.
        4. Replace the battery cover.
        Cautions
        • Use only fresh batteries and always replace the old batteries by fresh batteries.
        • Do not mix old and new batteries, different types of batteries (standard, alkaline, or rechargeable), or rechargeable batteries of different capacities.
        • Dispose old batteries promptly and properly.
        Low battery alarm
        When indicator twinkles and speak ... do... do... user has to replace the battery.
      3. Using a headphone
        You should always use a headphone whenever you search with your metal detector. Headphone is especially useful in noisy area, such as the beach and near city area. It enhances audio perception by bringing the sound directly to your ears while masking 'outside' noise interference. You shall be amazed at how much better you can hear the detector signals with the headphone than you can with the speaker alone. Using headphones also save battery power.
        To connect a headphone to the detector, insert the headphone's 1/8 inch plug into the HEADPHONE JACK.

      Note
      The detector's internal speaker will be disconnected when you connect a headphone.

    4. Functions and indicators
      1. VIEW METER
        The pointer will swing to the right as the unit has made a detection
      2. DISC
        You can rotate the control from low to high to discriminate between metals.
      3. SENC
        When you rotate the SENS from on to high, the sensitivity is gradually increased. In general use, you can set the SENC to a higher position. But in mineralized area, or area with electrical interference, it's better to lower the SENS.
      4. MODE SWITCH
        ALL- Search for all kinds of metal objects without discrimination
        DISC- The mode DISC can facilitate in your search and discriminate the target type.
      5. TARGET To pinpoint the target. Press this button to lower the sensitivity automatically and to locate the target.
    5. Operation
      Your detector has 3 operation modes: ALL, DISC, TARGET. This three' are motion modes. You have to move the search coil to find your target.
      1. ALL. usually is used in general searching . In this mode, the unit will respond all kinds of metal. This mode cannot discriminate metal type.
      2. DISC. can help you to search and discriminate the target type. When mode switch is in DISC mode, DISC knob is used to control the discrimination range. When DISC is set to zero, unit will respond to any metal object with a tone. Slowly rotate the control clockwise to high position to reject more objects you don*t want. The unit will sound a tone, or even be silent to ferrous metal objects. This means the ferrous metal is rejected. Rotate the control further clockwise, nickel, zinc, and copper will be rejected. When more again, most metal objects are rejected, except silver.
      3. TARGET. The operation mode TARGET is non- motion mode. It works together with ALL mode to pinpoint the target accurately at a lower sensitivity. Set MODE switch to ALL, hold the search coil 50CM or more away from the ground. Press and hold down the TARGET button. Sweep the search coil slowly over the search area and then you will hear a constant sound when the coil approaches the target, release the button, wait one or tow seconds, the press and hold down the TARGET again, and the unit's sensitivity reduces along with. Sweep the search coil like the coil is the first time, and this time you will hear the sound once more only when the coil is more close to the target, release the button here. Repeat the above steps until the unit only sounds in a coil- size. Area, thus you pinpointed the location and the target should be under your search coil.
      4. SEARCHING COIL SWEEPING.
        Keep the search coil moving at a comfortable rate. TAKE YOUR TIME. If you walk too fast you cant overlap yours sweeps and you'll miss a lot of ground. Also if you sweep too fast, you'll lose sensitivity and miss the target.
        Keep the search coil parallel to and as close to the ground as practical. This is important for maximum coverage and depth. If you're hunting on a lawn you can rub the coil right on the grass. 
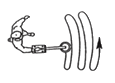
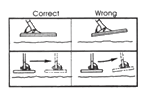
Overlap you sweeps approximately 50%

        Search in a methodical manner sweeping in a tight semicircle. Pay close attention to where you're going and where you've been.
      5. METAL DETECTOR OPERATORS ETHICS.
        Below are few basic rules you should follow while using your metal detector. Always get permission to hunt on private property.
        • Always leave a site cleaner than you found it. Take at least some trash with your or, if you can, take it all..
        • Always fill in your holes neatly whether you're in a city part or remote wilderness. Leave the land as it was before you disturbed it.
        • Always obey all laws relating to treasure Hunting.
        • Always return valuable property if you can locate the original owner.
        • Always to what ever you can to five the hobby of Treasure Hunting the good image if needs and deserves.
      6. PLACES WHERE YOU CAN USE YOUR METAL DETECTOR.
        • National Forest and Federal lands, State part and lands.
        • Corps of engineers, Lakes, shorelines and lands.
        • Because of Land Management (BLM) Lands
        • City or country park lands and public school grounds.
    6. MAINTENANCE
      Your detector do not require a lot of care, but where are few things your should do to keep it in operating condition.
      - if you're not going to use it for while, take the batteries out.
      - avoid extreme temperature like inside a closed car sitting in the sun.
      if you 'scrub' the search coil on the ground, you'll eventually ware off the bottom. Coil replacement are expensive. Instead, invest in an inexpensive coil cover ( or called the skid plate ).
      - Put a rain- rest cover over the control housing if you are hunting in rain, fog or dust.
      - keep detector dry and clean. Wipe off the lower stem before sliding into the upper stem and keep the lock nut treads free of sand and dirt.
    7. SPECIFICATION
      1. Battery: 6×1.5V AA alkaline batteries.
      2. CURRENT× STANDBY~30mA ~ MAX~80mA
      3. VOLTAGE RANGE: 7.2~ 9.6V
      4. FREQUENCY: 5.5KHZ
      5. SENSITIVITY: Min. 25cm (Test Coin: USDØ50)
      6. TEMPERATURE RANDE: - 20°C ~60°C
      7. SIZE: 540× 345× 150
      8. GROSS WEIGHT: 2.5KG
      9. NET WEIGHT: 1.1KG

    To all residents of the European Union Important environmental information about this product This symbol on this unit or the package indicates that disposal of this unit after its lifecycle could harm the environment.

    Do not dispose the unit ( or batteries ) as unsorted municipal waste : it should be brought to a specialized company for recycling. This unit should be returned to your distributor or to a local recycling service. Respect the local environmental rules. If in doubt, contact your local waste disposal authorities.

    MD3010II

    CONTROL PANEL
    Description:
    1. Battery low indicator
    2. Water proof search oil
    3. Target type-reject mask
    4. Programmable sensitivity
    5. Eight distinctive tones for different type of metals
    Specification:
    Battery: 6 ×1.5V AA alkaline batteries
    Operating current: STANDBY ~65mA, MAX ~150mA
    Operating Voltage Range: 7.2~9.6V
    Operating frequency: 7.5KHZ±1KHZ
    Sensitivity: Min. 8 inch (Test Coin: US¢50)
    Audio frequency:
    294Hz (re)
    330Hz (me)
    349 Hz (fa)
    392 Hz (so)
    440 Hz (la)
    494 Hz (ti)
    523 Hz (do)
    Temperature Range: -20°C~ 60°C
    Unit size: 540×345×150 cm
    Gross Weight: 2.5kg
    Net Weight: 1.1kg
    Packing: 4pcs/Ctn
    G/N Weight(kgs): 12.00/11.00
    Carton size(cm): 63 × 58 × 38 cm

    Features
    • LCD:
      The LCD with light, it improve to identify the metal in night or caliginous outside
    • Target Identity:
      The detected objects are shown on the LCD display. You can decide immediately if the objects worth to be recovered.
    • Unwanted Target Elimination:
      You can set the detector not to respond to some objects.
    • Unique Tone for target:
      you don't have to keep watching the LCD display, when an object is being detected, an unique tone corresponding to target will generate. You may even searching when there is little or no light
    • No clumsy slack cable:
      hidden search coil cable ( connecting between control unit and search coil) Avoid entangling and for ease of stem length adjustment
    • Headphone Jack:
      provided for headphone connection, both stereo or mono headphone can be used
    • Volume Control:
      for adjusting the output volume to the loud speaker or headphone.
    • Batteries condition indicator:
      shows the conditions of the batteries in the battery compartment
    • Waterproof search coil:
      lets you use the detector in the sallow water
    • Adjustable stem:
      lets you adjust the detectors length for comfortable use. The micro-plug that connects the search coil and the controller unit is made of metal which makes the plug more reliable
    • Armrest & stem:
      designed to eliminate strain on forearm, The nylon bracket to further secure the slip of the hand compartment after long holding the detector by arm.
    • Power:
      Use six 1.5 Volt AA alkaline batteries

    MD3011


    While purchasing, check the package contects carefully
    1. Main panel 1PC
    2. Search coil 1PC
    3. Upper stem 1PC
    4. Clip 4PCs
    5. Plastic screw A 2PCs
    6. Plastic nut 1PC
    7. Plastic wrench 1PC
    8. Conection bracket 1PC
    9. Main panel metal bracket 1PC
    10. Lead wire 1PC
    11. Nut bracket 1PC
    12. Middle stem ( 429mm ) 1PC
    13. Washer ( M5.0 ) 2PCs
    14. Nut ( M5.0 ) 2PCs
    15. Screw A ( M5.0 - 33PM ) 2PCs
    16. Screw C ( 3.5 - 12PA ) 2PCs
    17. Screw B ( M5.0 - 14PM ) 2PCs
    18. Lower stem 1PC
    19. 1.5V AA battery 6PCs
    • Aluminum Box package:
      Box Size: 64×45×25cm
      Gross Weight: 4.5KG

    • Carton package:
      Carton Size: 45×38×18cm
      Gross Weight: 2.2KG
    MD3011 underground metal detector apart from military applications, but also applies to the following areas:
    the public security departments Rapidity criminal search detection of raw materials, fuel, food metal debris to check mail, baggage and parcel of the metal items inspection of the underground pipes, cables archeology, prospecting found buried in the ground hidden treasures of gold and silver and metal scrap metal mineral acquisition
    1. latest electronic technology, with built-in balanced line.
    2. It can deliminate all the "mineralization reaction" impacts to the probe.
    3. It can distinguish between non-ferrous metals and ferrous metals, greatly enhanced the effective detection of the depth and accuracy.
    4. It has the characteristics of excellent probing depth, positioning accuracy, strong resolution and simple and convenient operation.
    Product functional characteristics:
    • metal detectors and metal identification function conversion
    • underground metal and metal mineral exploration
    • non-ferrous metals and ferrous metal identification
    • the automatic adjustment functions
    • manual adjustment to eliminate mineralization reaction
    • speakers audible devices
    • battery low power tips
    • LED luminous function
    • induction coil disconnected automatic alarm (when connecting cables loose when the automatic alarm)
    Product Specifications:
    Maximum Depth: 6-8 meters
    detection method: balance detection / identification detection
    main vibration frequency: 4.19MHz
    signal frequency: 7.2KHz
    Power: DC9V (6 1.5VAA batteries)
    Static current: 40MA
    low power: 7.2V +0.2 V 7.2V-0.2V

    MD6051

    1. Probe positioning plate
    2. Detection host
    3. Probe rod
    4. host strap
    5. handle
    6. Fix tool
    7. Charger
    8. Headphone
    9. Bracket
    10. Manual

    Can easily find coins, relics, jewelry, gold, silver and other precious metals and ease to use.
    • Sensor instruction sheet: Show or not to detect metal and metal type.
    • Audio instructions: to detect metal on a fixed frequency sound will be issued instructions.
    • Waterproof coil: even in the water, can also be detected. Note: The coil is waterproof, but the control panel is not waterproof.
    • Adjustable probe rod: You can adjust the rod to detect the most suitable length.
    • Dedicated strap-host: to reduce the long hand manipulations and hands are sore up to facilitate nimble.
    • Specifically with rechargeable battery: up to 8 hours of standby time, saving the heart section.
    • Professional support tools: easy to disassemble any time you assemble, easy to carry.
    • Ground Balance: the exclusion of faster and more accurately the critical balance.
    Specification
    1. Power: DC12V
    2. Frequency: 7KHZ
    3. Audio: 400-485HZ
    4. Sensitivity: 14~16 inch
             testing USD25sent
    • Unit size: 51.5×33.5×12.5CM
      Net weight: 3.5KG

    • Carton Package: 5PCs/carton
      Packing size: 66.5×53.5×35.5CM
      Gross Weight: 18KG/5PCs

    • Aluminum alloy Box packing
      Gross Weight: 5.5KG/PC
      Box size: 66.5×40×17CM


    About Contact
    1999~2021 © TradeSalon ®